Smart Email
intake.
Step 1 - Create Solution
Smart Email intake.
Step 1 - Create Solution
Solutions are used to transport apps and components from one environment to another or to apply a set of customizations to existing apps. A solution can contain one or more apps as well as other components such as site maps, tables, processes, web resources, choices, flows, and more.
Solutions are the mechanism for implementing application lifecycle management (ALM) in Power Apps and other Power Platform products, such as Power Automate.
In our case we need to customize the Case table to support language, category tagging and related translation content. In the following steps we’ll add the following columns:
- Category Tags, for category classification tagging
- Category Tags Translated, for the translated into common language category classification tagging
- Description Translated, for the description translated into the common language
- Language, for the identified language code of the description content
- Language Score, for the confidence score of the detected language
In addition we’ll customize an existing form to show the “Case Analytics” columns and add a new view to review the “Case Analytics” data.
To create a solution:
- Sign in to Power Apps (https://make.powerapps.com/) and select Solutions from the left navigation.
-
Select New solution and then complete the required columns for the solution.
Field Value Description Display Name Case Management The name shown in the list of solutions. You can change this later. Name CaseManagement The unique name of the solution. This is generated using the value you enter in the Display Name column. You can edit this before you save the solution, but after you save the solution, you can’t change it. Publisher "Your Publisher" You can select the default publisher or create a new publisher. We recommend that you create a publisher for your organization to use consistently across your environments where you will use the solution. Version 0.0.0.1 Enter a number for the version of your solution. This is only important if you export your solution. The version number will be included in the file name when you export the solution. - Select Create.
- Select “Add existing” – “Table”
- Search for “Case” and select the table
- Select “Next”
- Select “Select objects” as we limit the customization and dependency to a minimum
- In Columns search for “Description” and select the column
- In Forms search for “Case for Interactive experience” and select the column
- Select “Add”
-
Now we’ve to add additional columns to manage Category Tags, Language, Language Score and Translated text for Description and Category Tags as following.
Display Name Category Tags Category Tags Translated Description Translated Language Language Score Data type Single line of text Single line of text Multiple lines of text Single line of text Number Format Plain text Plain text Plain text Float Schema name categorytags categorytagstranslated descriptiontranslated language languagescore Minimum value 0 Maximum character count 4’000 4’000 1’048’576 2 1 Decimal places 5 -
Select “New column” and add the five new columns base on the table above to the Case table. See results
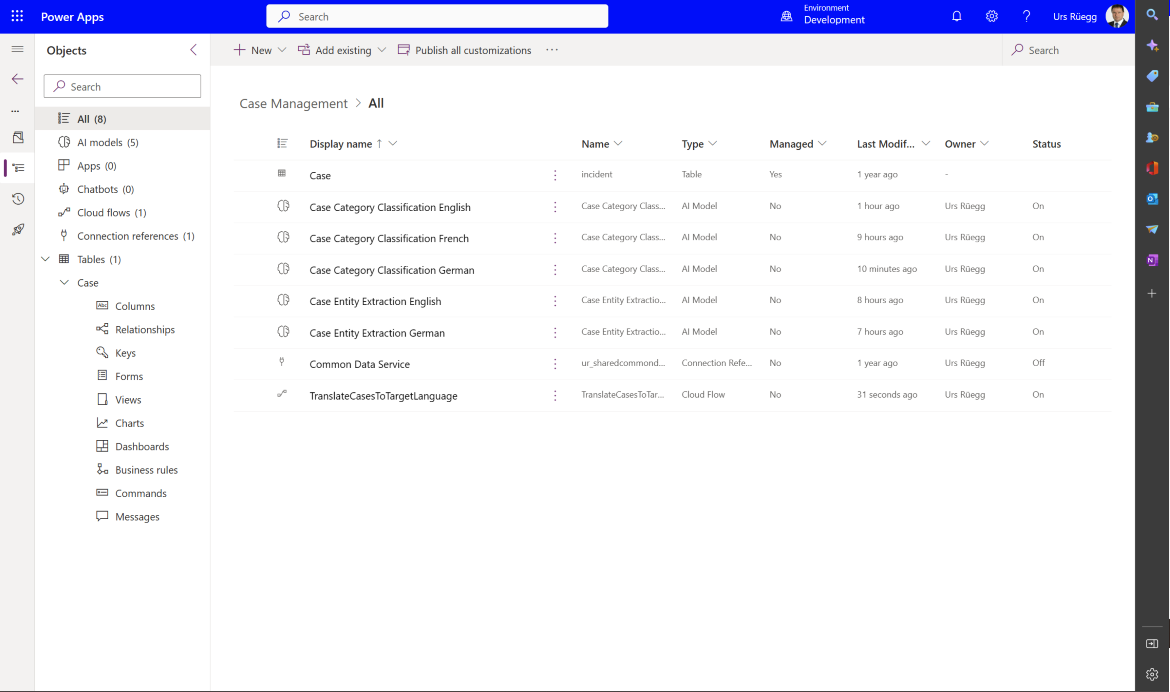 Create
Solution
Case table with five
new columns for case analytics.
Create
Solution
Case table with five
new columns for case analytics.
- Select “Forms” in the objects navigation
- Select “Case for Interactive experiences” and choose edit
-
In “Details” tab add an new section called “Case Analytics” and add the five new created columns and Description to the section. See result
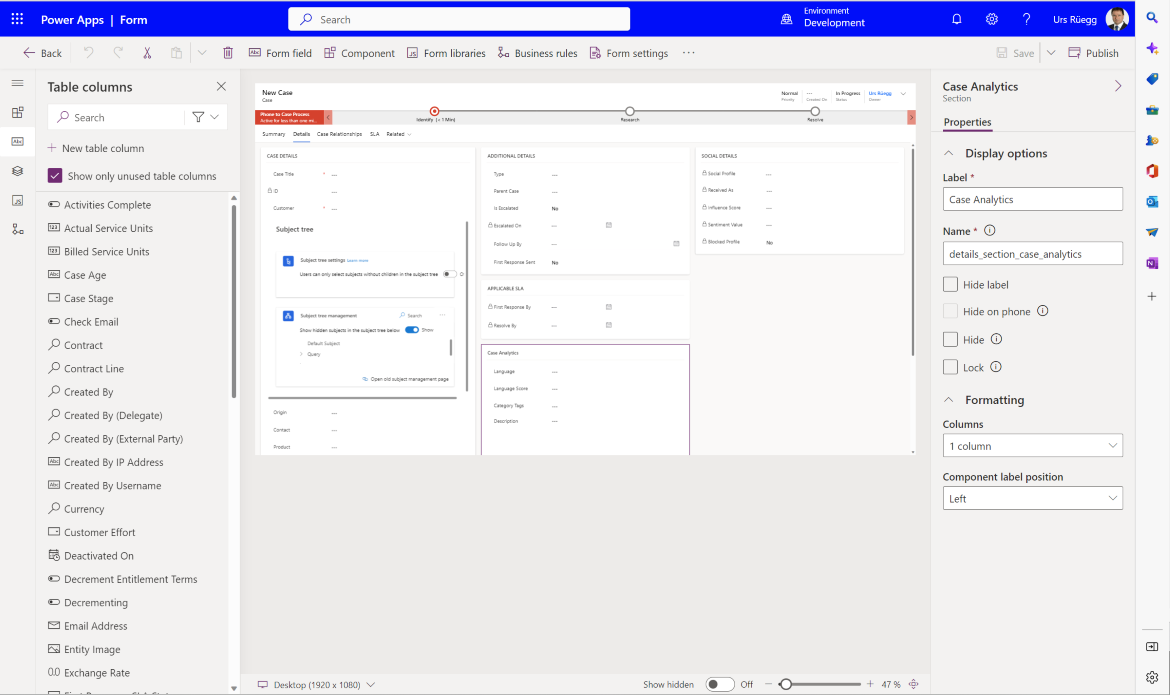 Create
Solution
Add an new section
called “Case Analytics” and add the five new created
columns and Description to the section.
Create
Solution
Add an new section
called “Case Analytics” and add the five new created
columns and Description to the section.
- Select “Publish”
- Now we need to add a new view to review the Case Analytics. Select “Views” in the objects navigation
-
Select “New view” and name it “Active Case Analytics”
 Create
Solution
Add new view and
name it “Active Case Analytics”.
Create
Solution
Add new view and
name it “Active Case Analytics”.
- Select “Create”
-
Add the five columns and Description to the new view. Change Sort and Filter as needed. See result
 Create
Solution
Add the five columns
and Description to the new view. Change Sort and Filter
as needed.
Create
Solution
Add the five columns
and Description to the new view. Change Sort and Filter
as needed.
- Select “Publish”
- Go back and select in the Objects navigation “All”. Select “Publish all customizations”
- Now we can check if the customization is correct adapted. Open “Customer Service Hub”, select “Cases”.
-
Change view to “Active Case Analytics”
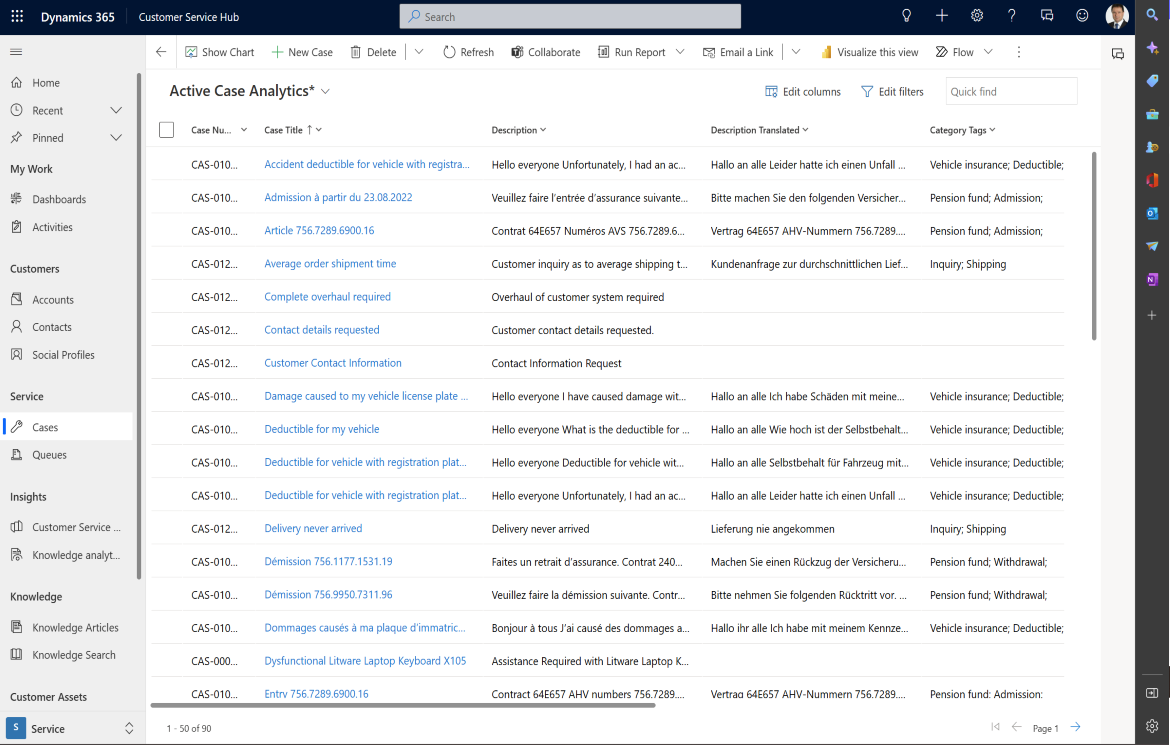 Create
Solution
Change view to
“Active Case Analytics”.
Create
Solution
Change view to
“Active Case Analytics”.
-
Select and open a case
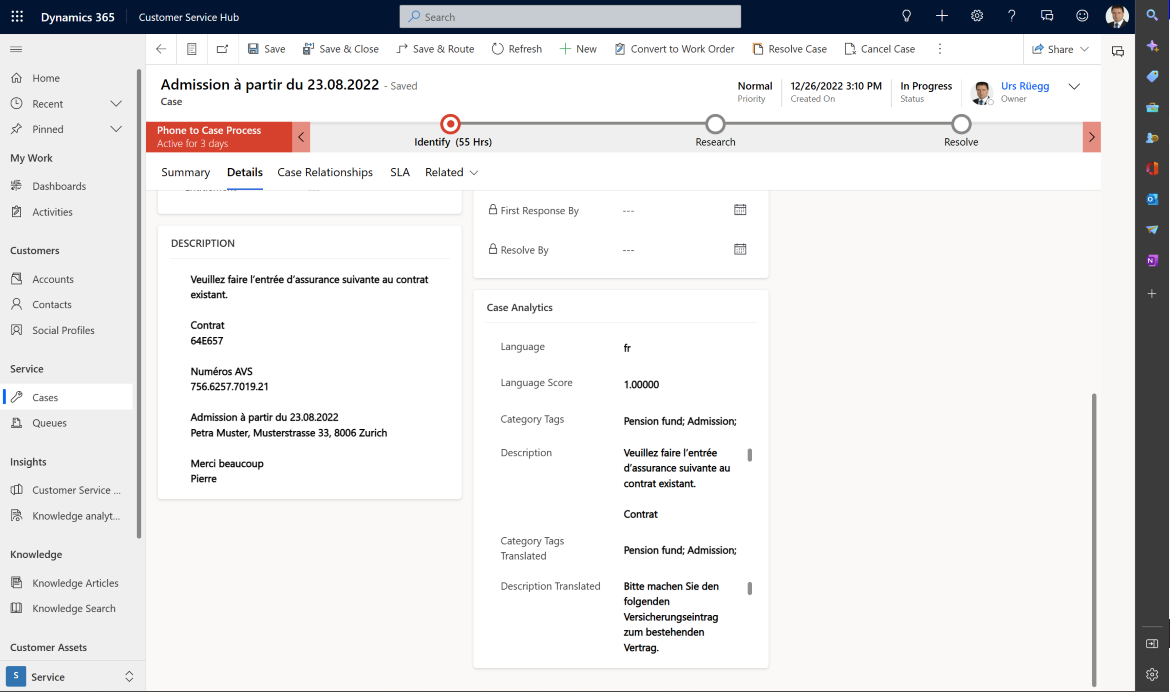 Create
Solution
Select and open a
case choose tab "Details".
Create
Solution
Select and open a
case choose tab "Details".
Now we set the foundation to analysis cases. Next step is now to configure the Automatically create Case records from Email ruleset described in step 2.
Steps by step guide
- Create a solution “Case Management”
- Create a Automatically create Case records from Email ruleset
- Create instant flow “TranslateCasesToTargetLanguage”
- AI Builder category classification custom model
- Extend Automatically create Case flow with AI Builder models
- Configure Unified Routing based on Category Tags to Agents
3. Jan 2023