Add Search to Azure Static Web Apps
In the previous blog we deployed a Static HTML Website with Azure Static Web Apps. Now we extend this with custom search capabilities to index and search the static website. We can use Bing Search or Azure Cognitive Search.
- Bing Web Search API searches the indexes on Bing.com for matching terms you submit. Indexes are built from HTML, XML, and other web content on public sites. Built on the same foundation, Bing Custom Search offers the same crawler technology for web content types, scoped to individual web sites.
- Azure Cognitive Search is strongest for full text search workloads over content stores and databases on Azure, for apps that rely primarily on search for both information retrieval and content navigation.
Azure Cognitive Search key strengths include:
- Data integration (crawlers) at the indexing layer.
- AI and machine learning integration with Azure Cognitive Services, useful if you need to make unsearchable content full text-searchable.
- Security integration with Azure Active Directory for trusted connections, and with Azure Private Link integration to support private connections to a search index in no-internet scenarios.
- Linguistic and custom text analysis in 56 languages.
- Full search experience: rich query language, relevance tuning and semantic ranking, faceting, autocomplete queries and suggested results, and synonyms.
- Azure scale, reliability, and world-class availability.
In my case as the website is pure HTML based, Bing Search is sufficient.
Create Bing Custom Search instance
To use Bing Custom Search, you need to create a custom search instance that defines your view or slice of the web. This instance contains the public domains, websites, and webpages that you want to search, along with any ranking adjustments you may want.
To create the instance, use the Bing Custom Search portal.
 Bing Custom Search
portal
Create Bing Custom Search
instance
Bing Custom Search
portal
Create Bing Custom Search
instance
Prerequisites
- Create an Azure resource - Start using the Bing Custom Search API by creating one of the following Azure resources.
- Bing Custom Search resource - Available through the Azure portal until you delete the resource.
Create a custom search instance
To create a Bing Custom Search instance:
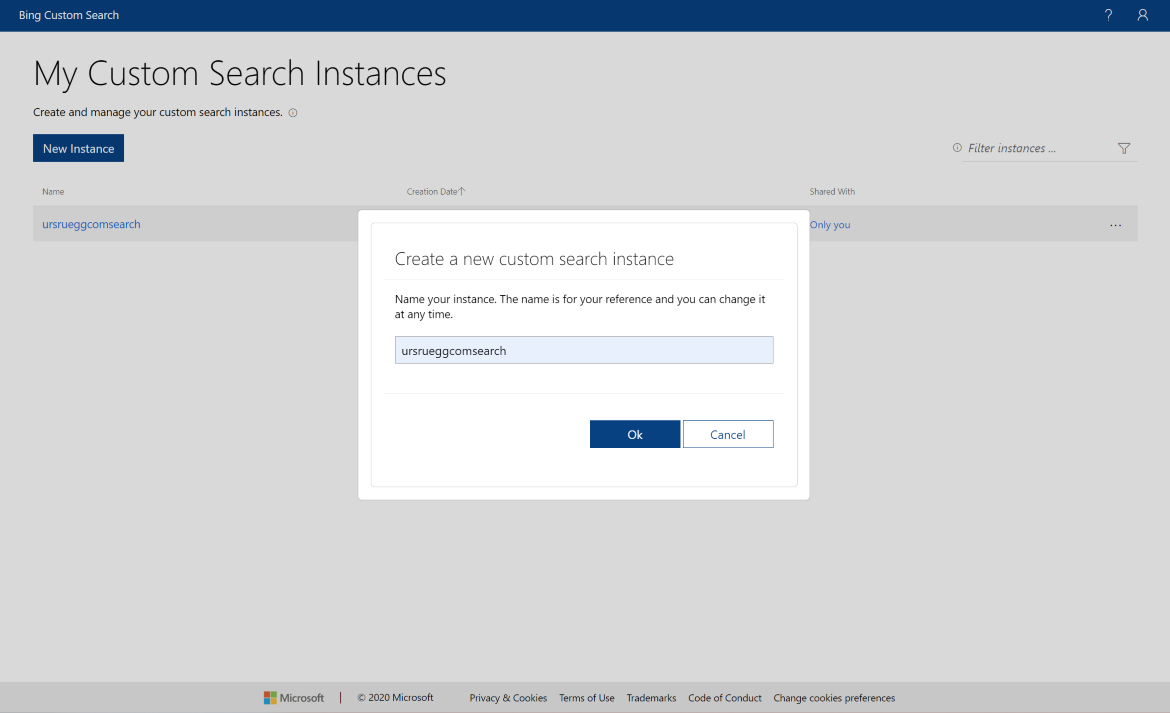
- Click Get Started on the Bing Custom Search portal webpage, and sign in with your Microsoft account.
- Click New Instance, and enter a descriptive name. You can change the name of your instance at any time.
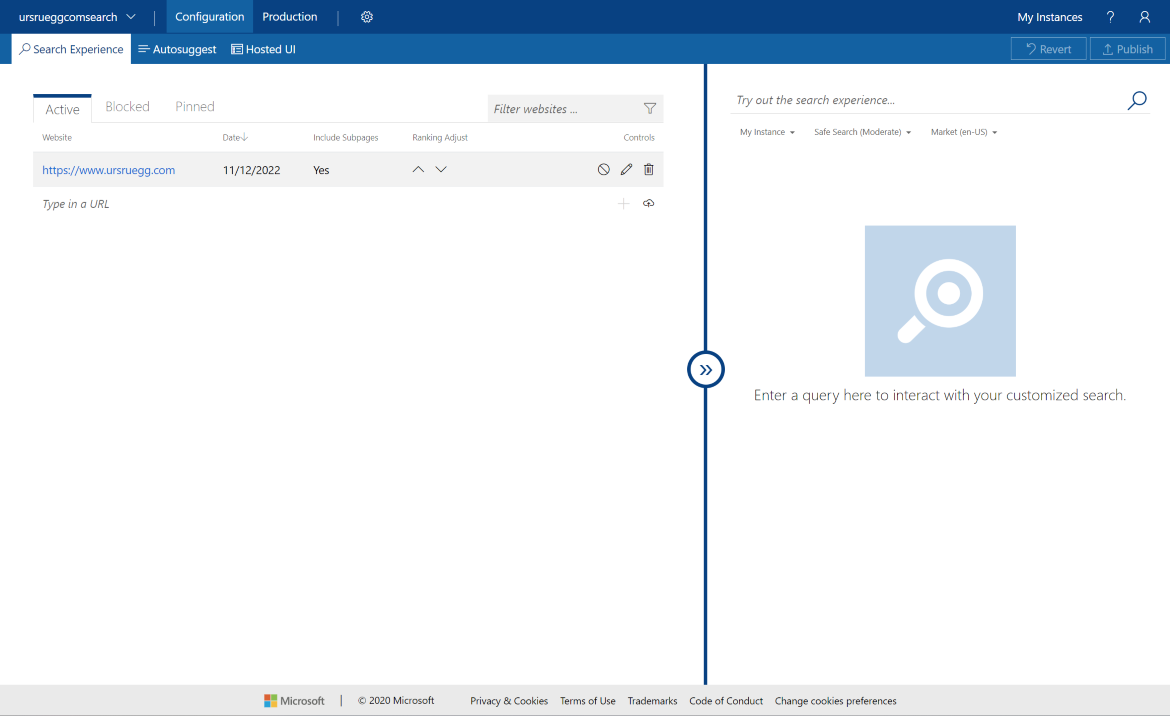
- On the Active tab under Search Experience, enter the URL of one or more websites you want to include in your search.
- You can use the right side of the Bing Custom Search portal to enter a query and examine the search results returned by your search instance. If no results are returned, try entering a different URL.
- Click Publish to publish your changes to the production environment, and update the instance's endpoints.
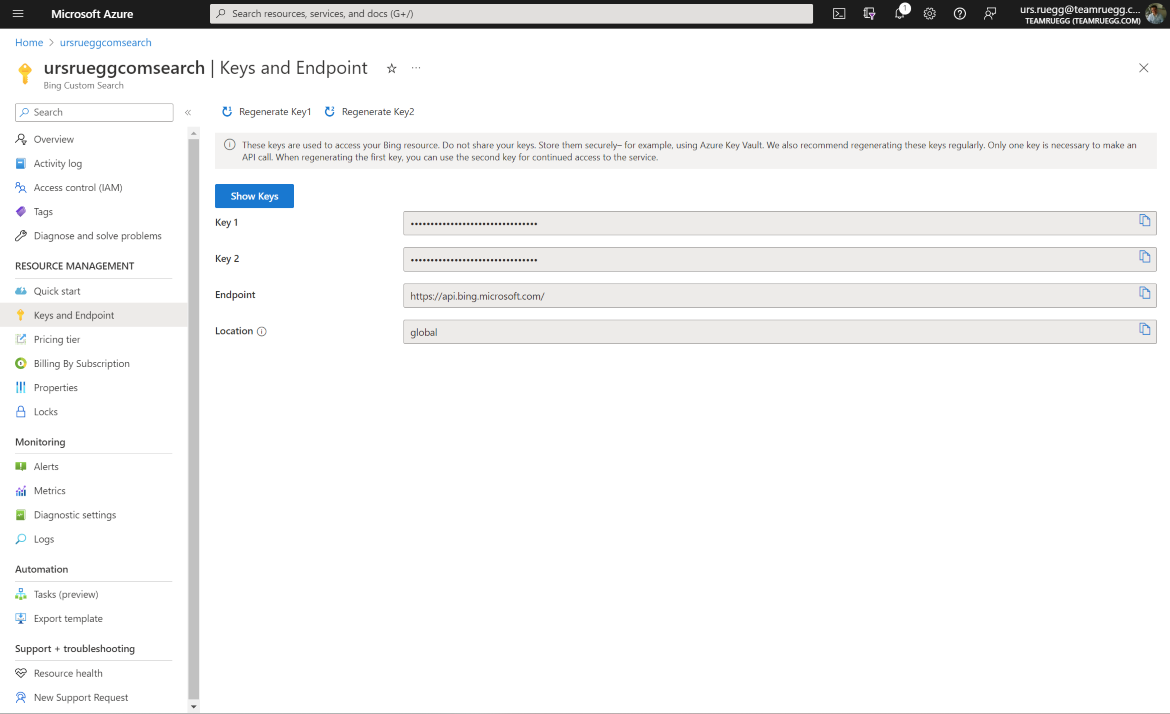
- Click on the Production tab under Endpoints, and copy your Custom Configuration ID. You need this ID to call the Custom Search API by appending it to the customconfig= query parameter in your calls.
Build a Custom Search web page
Bing Custom Search enables you to create tailored search experiences for topics that you care about. For example, if you own a martial arts website that provides a search experience, you can specify the domains, sub-sites, and webpages that Bing searches. Your users see search results tailored to the content they care about instead of paging through general search results that may contain irrelevant content.
Prerequisites
To follow along with the tutorial, you need a subscription key for the Bing Custom Search API. To get a key, Create a Bing Custom Search resource in the Azure portal.
 Azure Search
Subscription Key
Build a Custom Search web
page
Azure Search
Subscription Key
Build a Custom Search web
page
Create a custom search instance
To create a Bing Custom Search instance:
- Open an internet browser.
- Navigate to the custom search portal.
- Sign in to the portal using a Microsoft account (MSA). If you don't have an MSA, click Create a Microsoft account. If it's your first time using the portal, it will ask for permissions to access your data. Click Yes.
- After signing in, click New custom search. In the Create a new custom
search instance window, enter a name
that's meaningful and describes the type of content the search returns.
You can change the name at any time.
 Create a new
custom search instance
Build a Custom
Search web page
Create a new
custom search instance
Build a Custom
Search web page
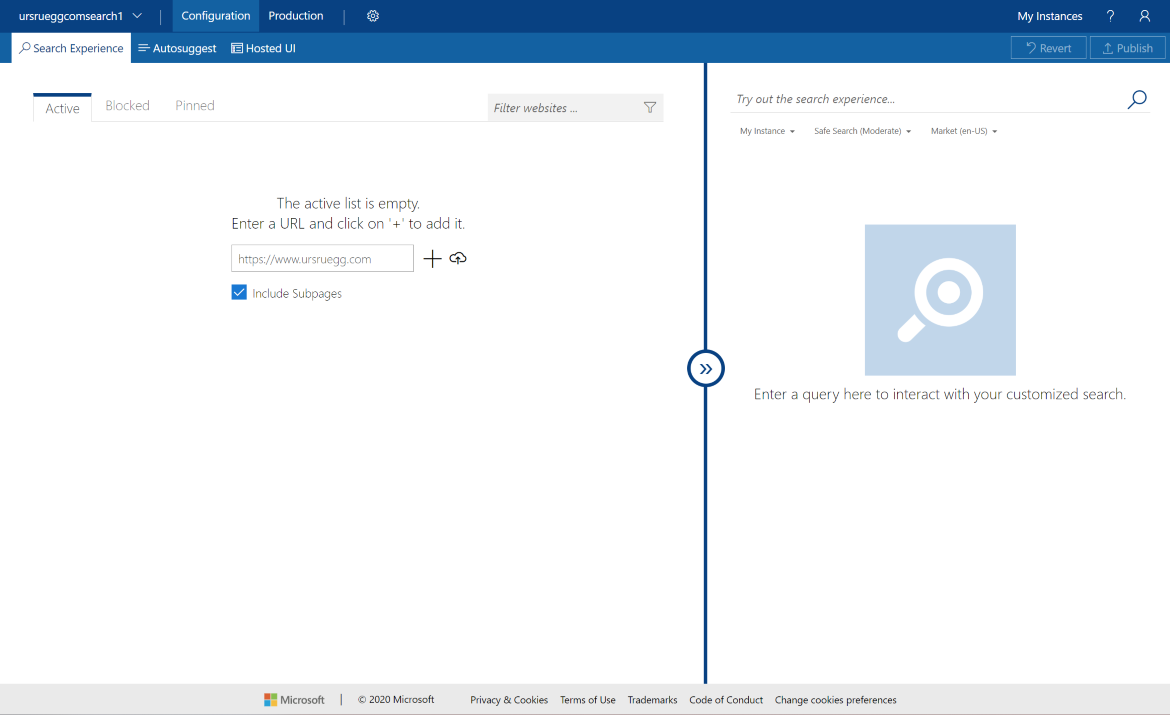
- Click OK, specify a URL and whether to include subpages of the URL.
 URL definition
page
Build a Custom
Search web page
URL definition
page
Build a Custom
Search web page
Add active entries
To include results from specific websites or URLs, add them to the Active tab.
- On the Configuration page, click the Active tab and enter the URL of one
or more websites you want to include in
your search.
 The Definition
Editor active tab
Build a Custom
Search web page
The Definition
Editor active tab
Build a Custom
Search web page
- To confirm that your instance returns results, enter a query in the preview pane on the right. Bing returns only results for public websites that it has indexed.
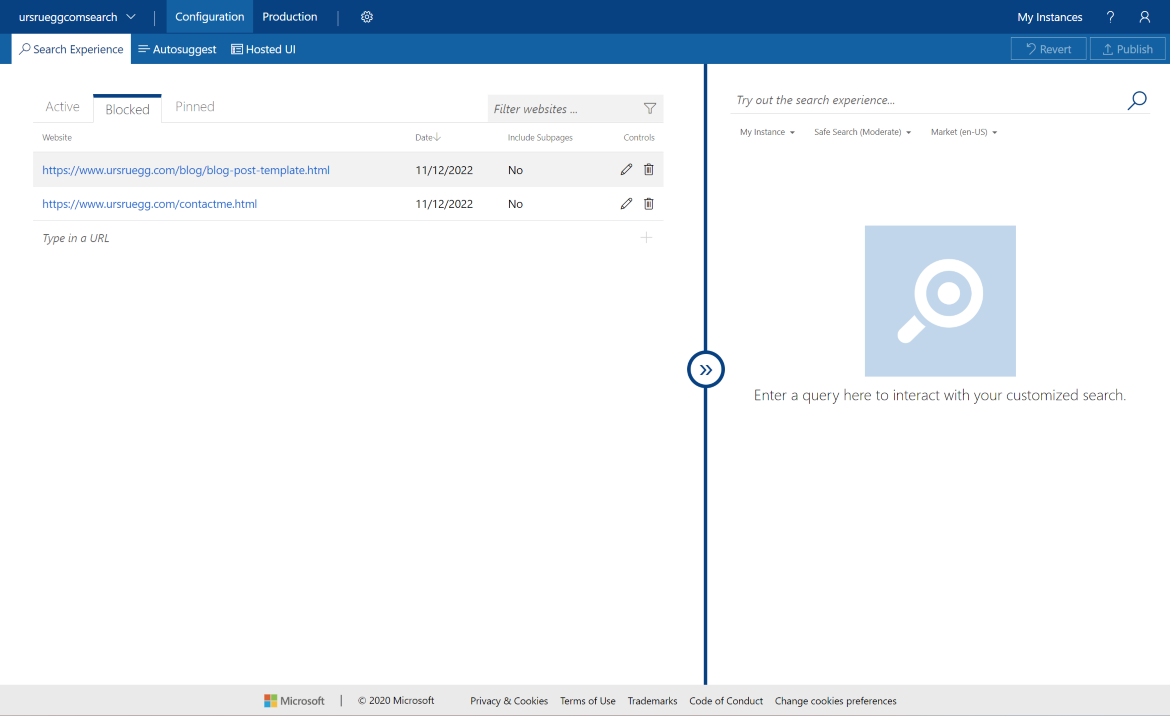
Add blocked entries
To exclude results from specific websites or URLs, add them to the Blocked tab.
- On the Configuration page, click the Blocked tab and enter the URL of
one or more websites you want to exclude
from your search.
 The Definition
Editor blocked tab
Build a Custom
Search web page
The Definition
Editor blocked tab
Build a Custom
Search web page
- To confirm that your instance doesn't return results from the blocked websites, enter a query in the preview pane on the right.
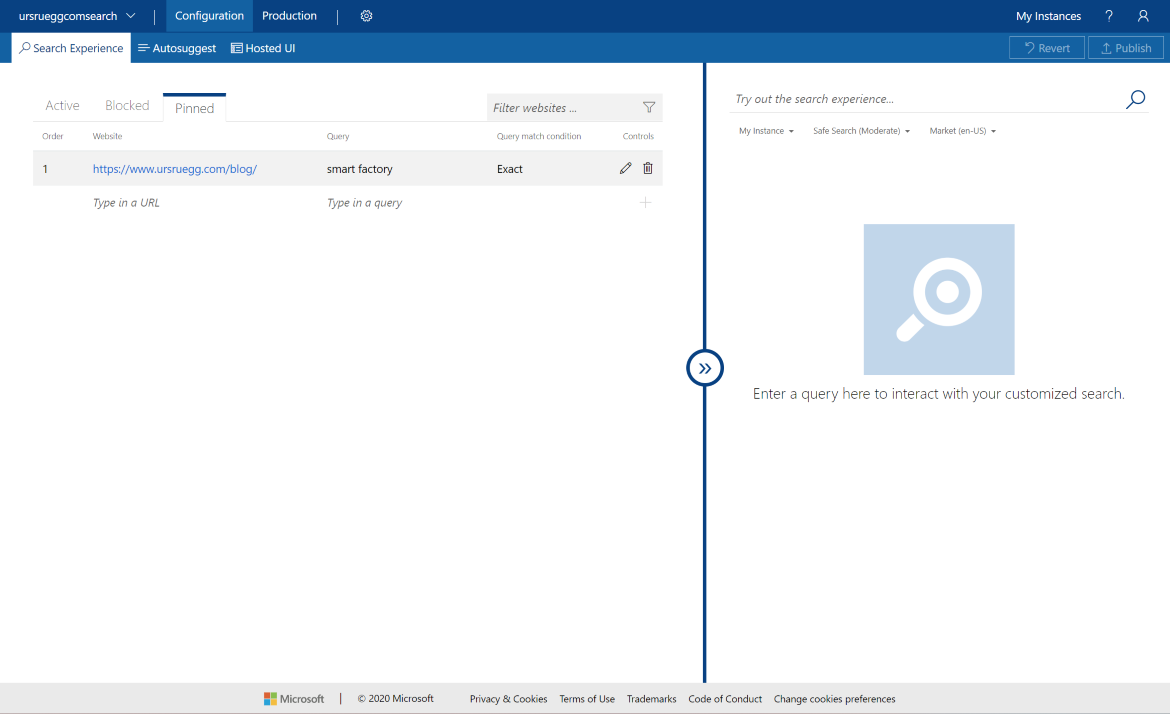
Add pinned entries
To pin a specific webpage to the top of the search results, add the webpage and query term to the Pinned tab. The Pinned tab contains a list of webpage and query term pairs that specify the webpage that appears as the top result for a specific query. The webpage is pinned only if the user's query string matches the pin's query string based on pin's match condition. Only indexed webpages will be displayed in searches. For more information, see Define your custom view.
- On the Configuration page, click the Pinned tab and enter the webpage and query term of the webpage that you want returned as the top result.
- By default, the user's query string must exactly match your pin's query
string for Bing to return the webpage as
the top result. To change the match condition, edit the pin (click the
pencil icon), click Exact in the Query
match condition column, and select the match condition that's right for
your application.
 The Definition
Editor pinned tab
Build a Custom
Search web page
The Definition
Editor pinned tab
Build a Custom
Search web page
- To confirm that your instance returns the specified webpage as the top result, enter the query term you pinned in the preview pane on the right.
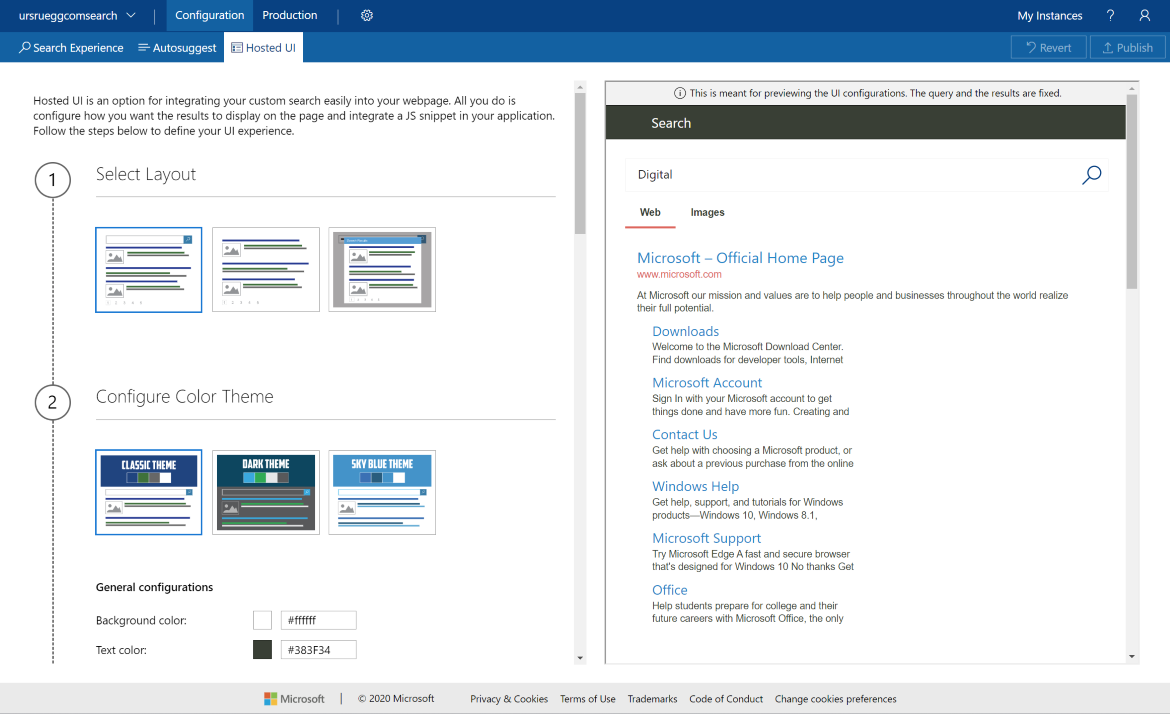
Configure Hosted UI
Custom Search provides a hosted UI to render the JSON response of your custom search instance. To define your UI experience:
- Click the Hosted UI tab.
- Select a layout.
 Hosted UI
select layout
Build a Custom
Search web page
Hosted UI
select layout
Build a Custom
Search web page
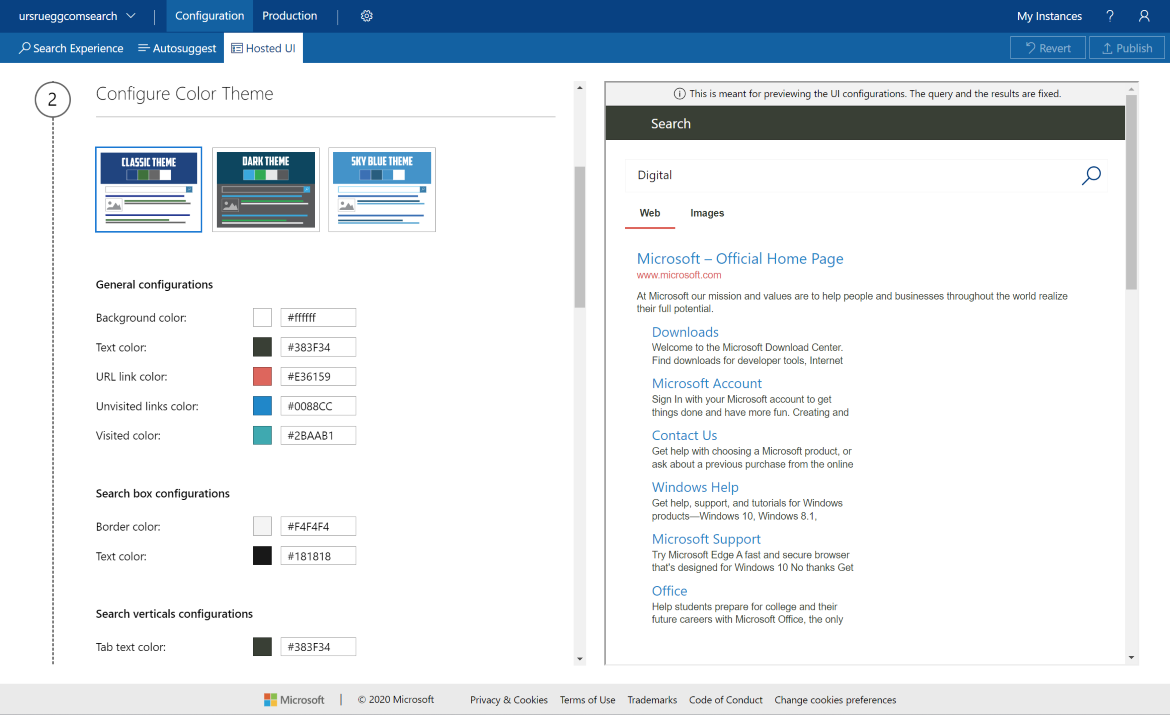
- Select a color theme.
 Hosted UI
select color theme
Build a Custom
Search web page
Hosted UI
select color theme
Build a Custom
Search web page
If you need to fine-tune the color theme to better integrate with your web app, click Customize theme. Not all color configurations apply to all layout themes. To change a color, enter the color's RGB HEX value (for example, #366eb8) in the corresponding text box. Or, click the color button and then click the shade that works for you. Always think about accessibility when selecting colors.
- Specify additional configuration options.
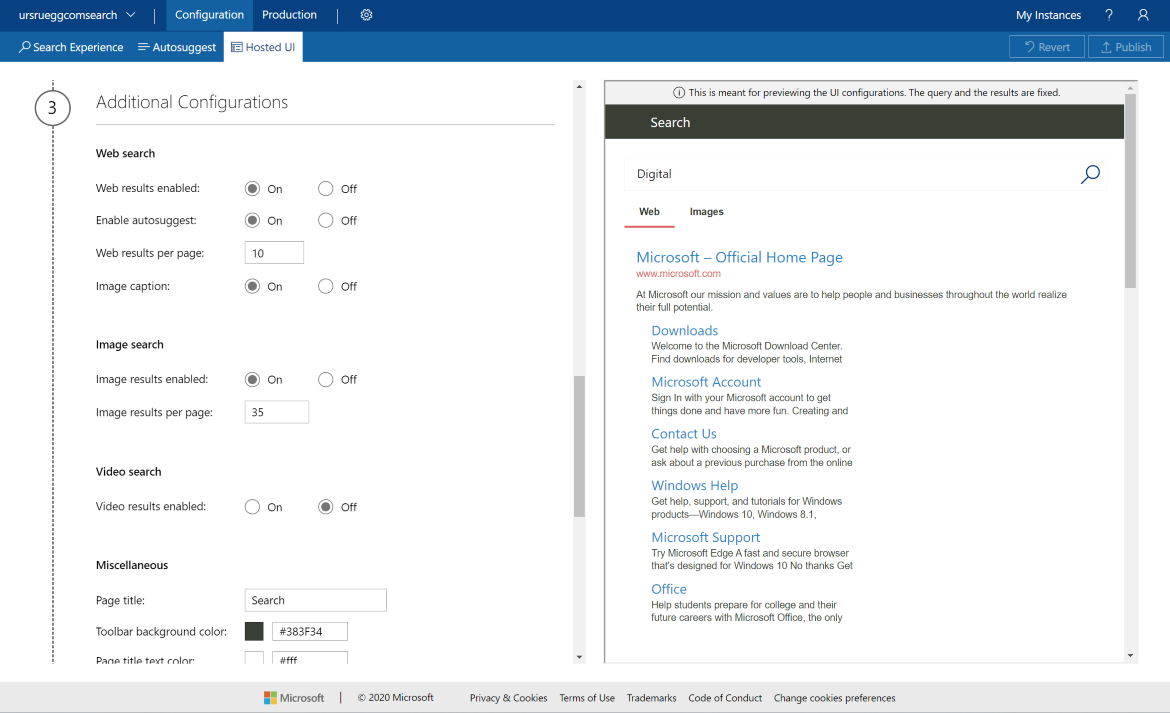 Hosted UI
additional configurations
Build a Custom
Search web page
Hosted UI
additional configurations
Build a Custom
Search web page
- Select your subscription keys from the dropdown lists. Or, you can enter the subscription key manually.
To get advanced configurations, click Show advanced configurations. This
adds configurations such as Link target
to Web search options, Enable filters to Image and Video options, and
Search box text placeholder to
Miscellaneous options.
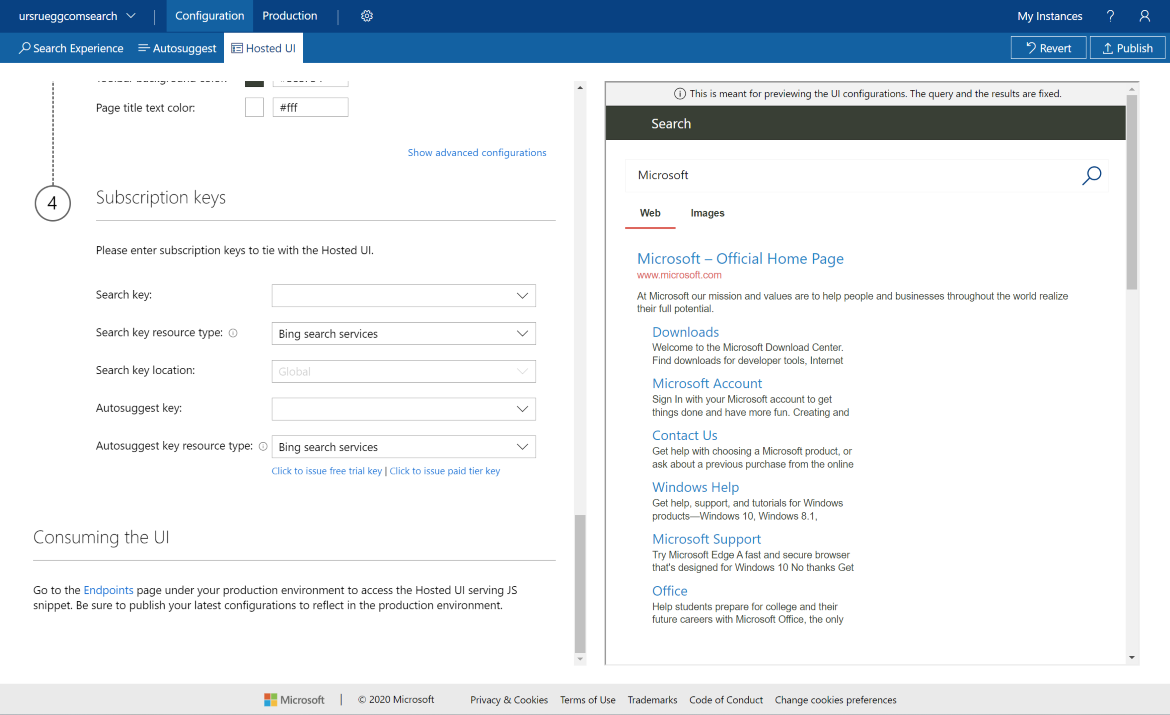 Hosted UI
additional configurations, add Subscription Key
Build a Custom
Search web page
Hosted UI
additional configurations, add Subscription Key
Build a Custom
Search web page
Publish or revert
Changes you make to a Custom Search instance are made in the Configuration tab so you can validate your changes. When you're done making changes and are ready to publish, click Publish. Changes are not reflected against your production endpoints until you publish.
Before publishing, if you decide that you don't want to keep the changes
you've made, click Revert. When you revert your changes,
the live state configuration is unchanged and the
12. Nov 2022