Use Azure Custom Vision for Factory Visitor PPE check
Use Azure Custom Vision for Factory Visitor PPE check
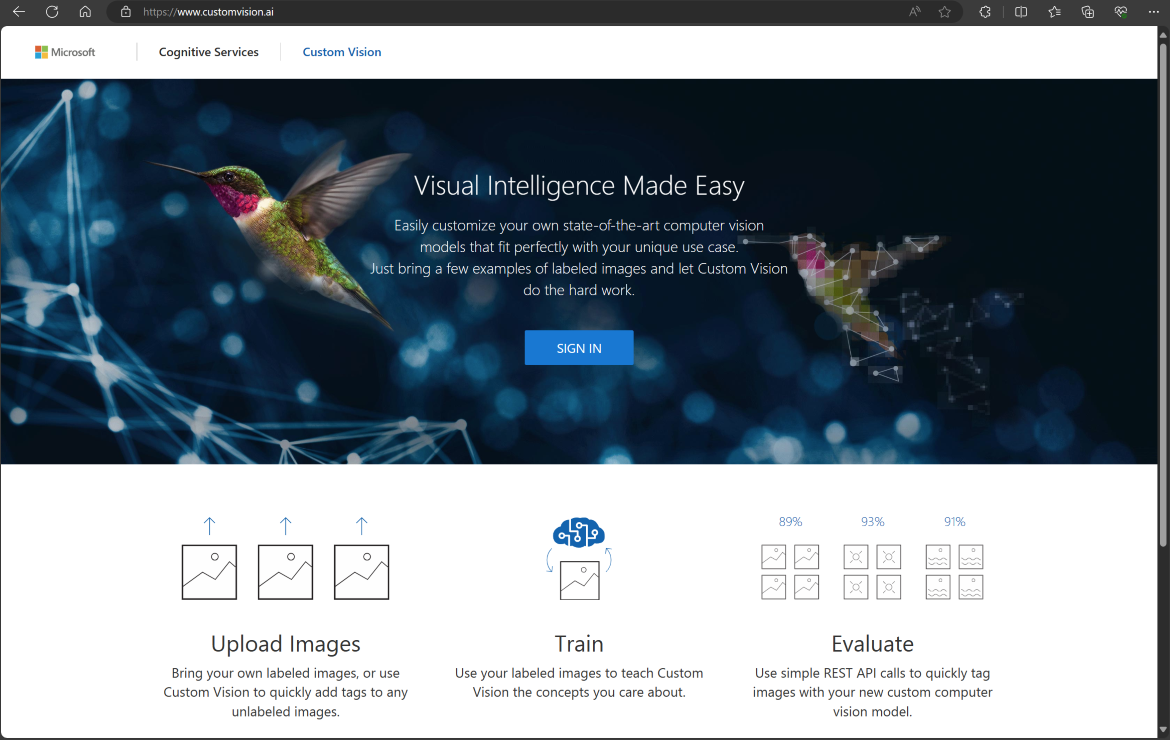
This tutorial will guide you through the steps of setting up a visitor management system that uses Azure Custom Vision service to check if visitors are wearing the required personal protective equipment (PPE) in a factory environment. You will learn how to:
- Create a Custom Vision project and train it with images of people wearing or not wearing yellow hard hats.
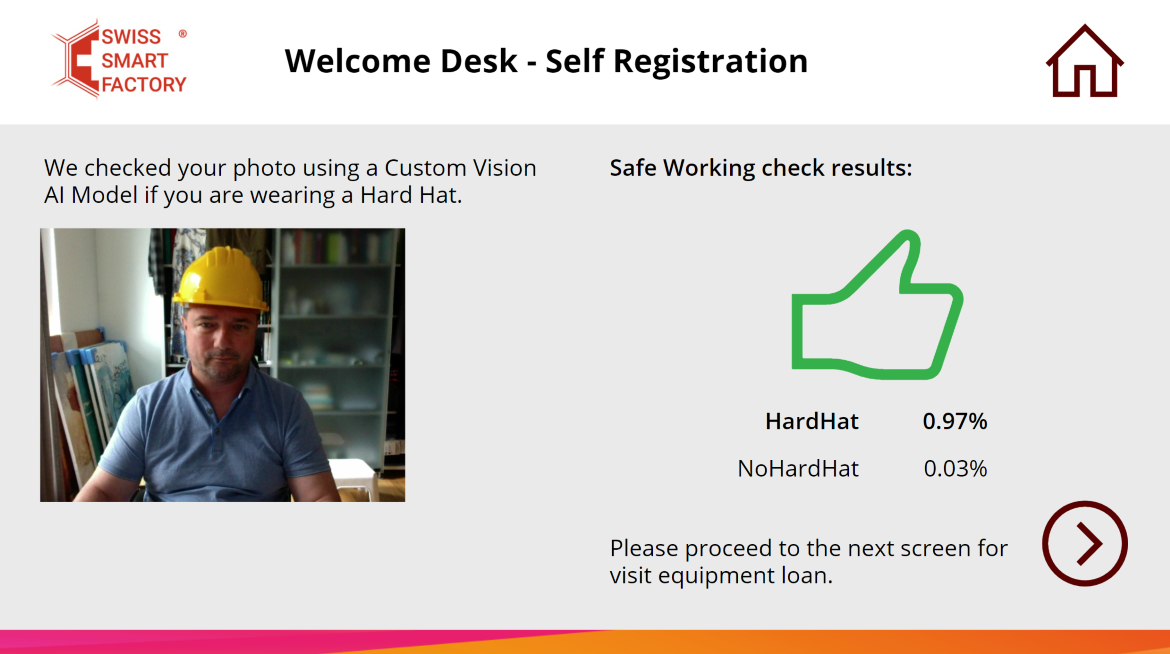
- Deploy the model and use it within Power Apps based Visitor Check In app to capture visitors’ photos during the check in process.
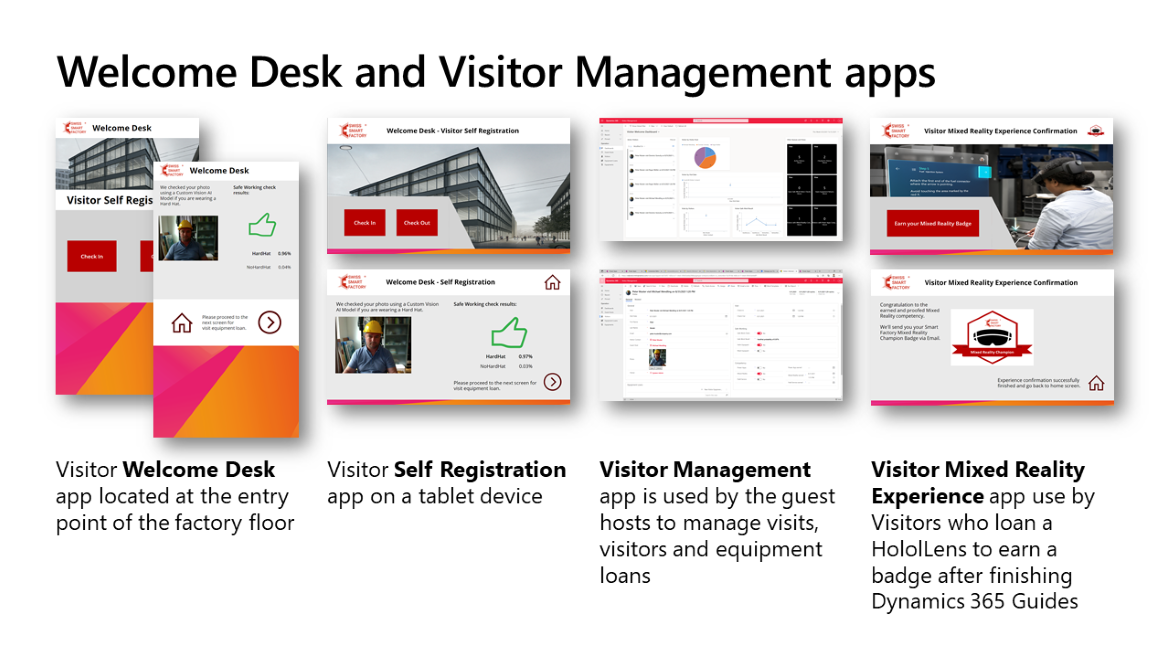 Visitor Management
The Visitor Management is a
collection of four Power Apps to
manage smart factory visitors.
Visitor Management
The Visitor Management is a
collection of four Power Apps to
manage smart factory visitors.
What you will do
- Build a vision AI model with Azure Custom Vision service that detects if a person is wearing a yellow hard hat for workplace safety applications.
- Build a Power Apps Canvas app to capture visitor photo and check PPE helm equipped use the Azure Custom Vision.
What you will need
- Active Azure account (Create a free account here)
- Power Platform environment (Create and manage environments in the Power Platform admin center).
- To use the Custom Vision service, you will need to create Custom Vision Training and Prediction resources. This is done when creating a new project in customvision.ai. In case there are issues in setting up a new project, please try creating the resource manually in Azure portal.
- Yellow hard hat to test the model.
Create a vision AI model with Azure Custom Vision service
In this tutorial, you will build a vision AI model for a workplace safety scenario that detects if a person is wearing a hard hat or not. Don’t you have a yellow hard hat to be able to test the functionality after you are done? You can also take pictures and use your own data to build the Vision AI model. Take 30+ pictures for a selected object from different angles and distances instead of using the pictures for hard hat model. You can also use the camera to take pictures (you’ll need to install Python and GitHub).
Create a vision AI model with Azure Custom Vision service
There are two ways to train your model - image classification and object detection.
- Image classification: Analyzes the whole frame as a picture and doesn’t draw bounding boxes. Can only identify one object per frame. Easy to train.
- Object detection: Can identify multiple objects per image and draw bounding boxes around them. It takes a little bit more time to train as the training requires identifying the object per uploaded image. If you choose to use the object detection model with hard hat data, remember to include both the wearer’s head and hard hat as the object when applicable (not only the hat).
Steps
- Create new Azure Custom Vision resources.
- Setup a new Azure Custom Vision project.
- Create new connection for your Power Apps environment.
- Create Power Apps to test the custom vision model.
Step by step
Now let’s do that step by step.
Step 1 - Create new Azure Custom Vision resources
- Login to the Azure Portal at https://portal.azure.com.
- Create a resource by clicking «+ Create a resource».
- Type «Custom Vision» into the marketplace search area.
- Select «Custom Vision» resource and create a resource.
- Within the «Basic» service configuration select:
- Select «Review + create».
- Review the configuration and select «Create» to start the deployment process.
- After the deployment process is successfully finished, two new resources are created
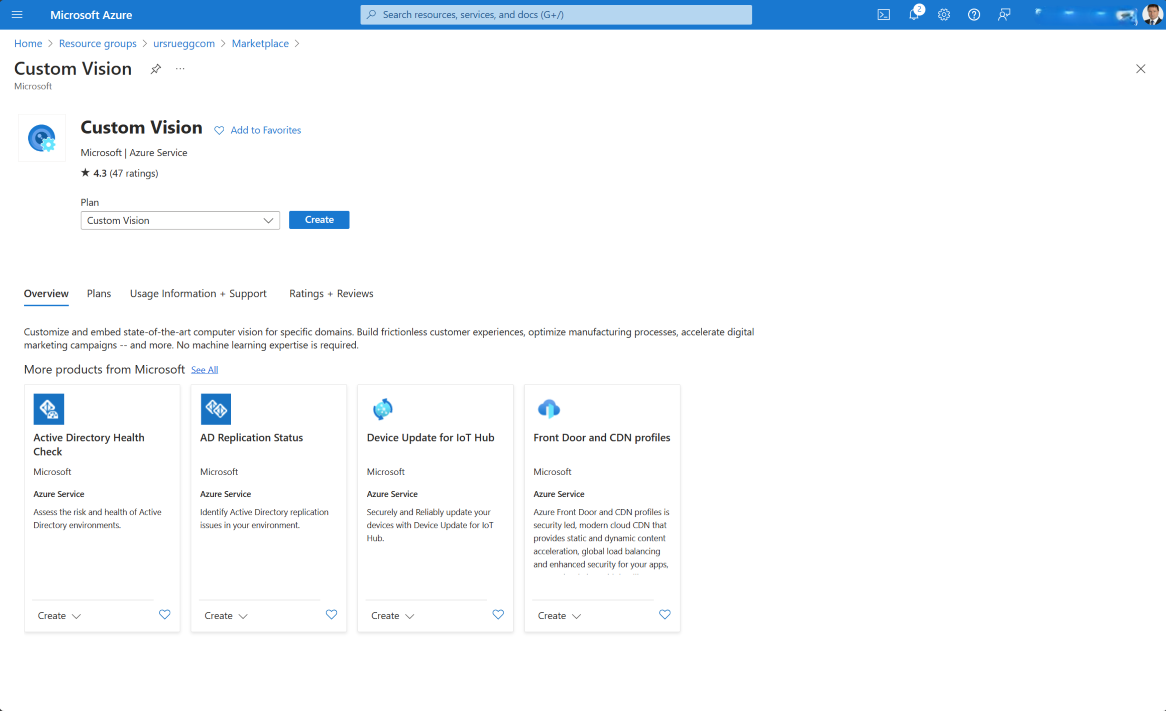 Microsoft Azure Custom Vision
Create Microsoft Azure Custom Vision resource
Microsoft Azure Custom Vision
Create Microsoft Azure Custom Vision resource
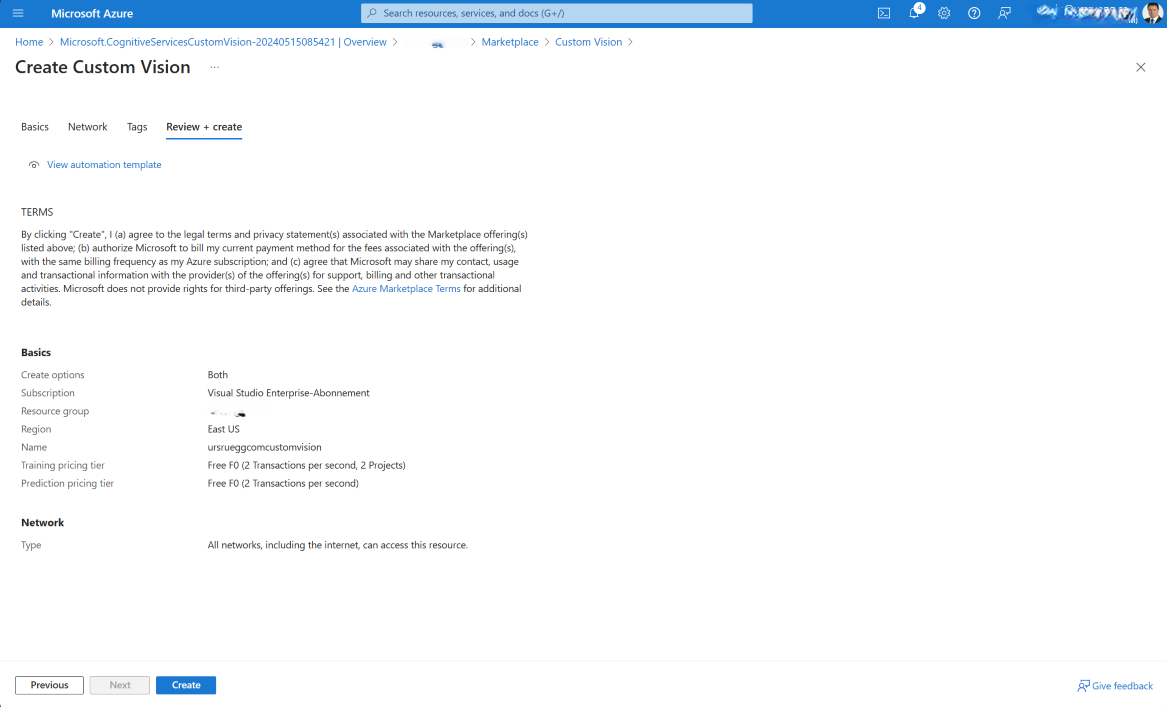 Microsoft Azure Custom Vision
Review and create the Microsoft Azure Custom Vision resource
Microsoft Azure Custom Vision
Review and create the Microsoft Azure Custom Vision resource
Now we have prepared the foundation to create a Custom Vision project to train our own model.
Step 2 - Setup a new Azure Custom Vision project
- Login to the Azure Custom Vision Service at https://www.customvision.ai.
- Within Custom Vision portal select «New project».
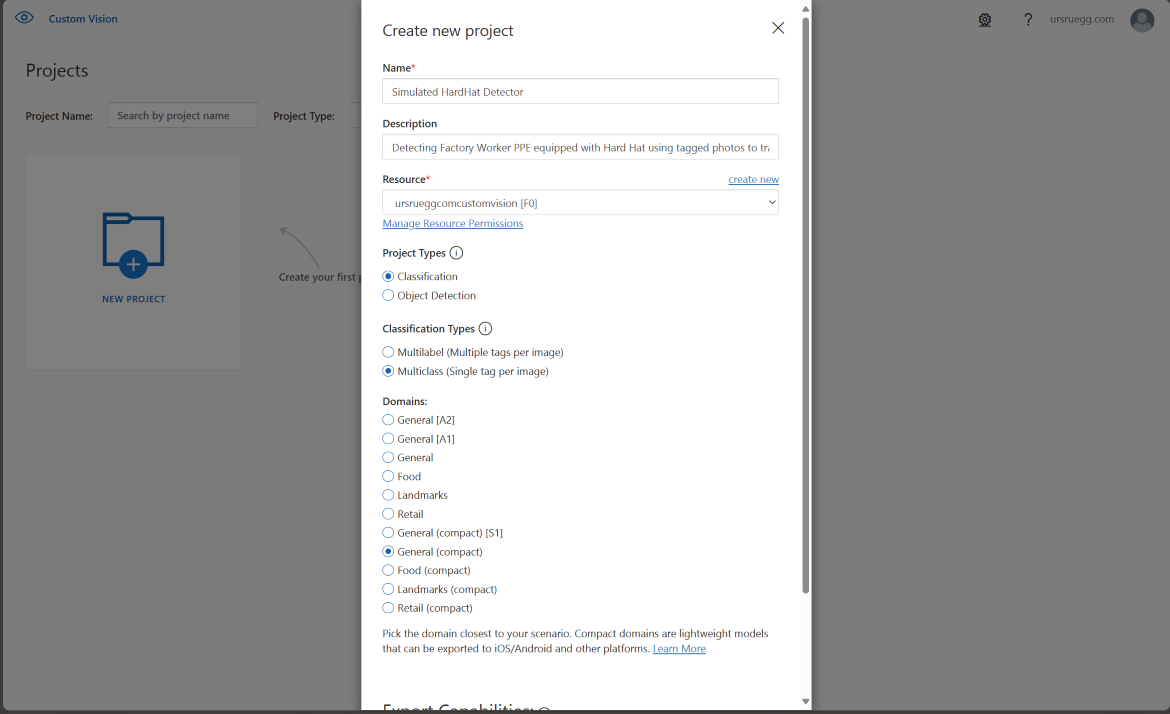
- Create new project as follows:
- After the new project is successfully created, you can start to train the model using sample photos.
- Download the training images here - TrainingData.zip.
- Uncompress the zip file to a local directory.
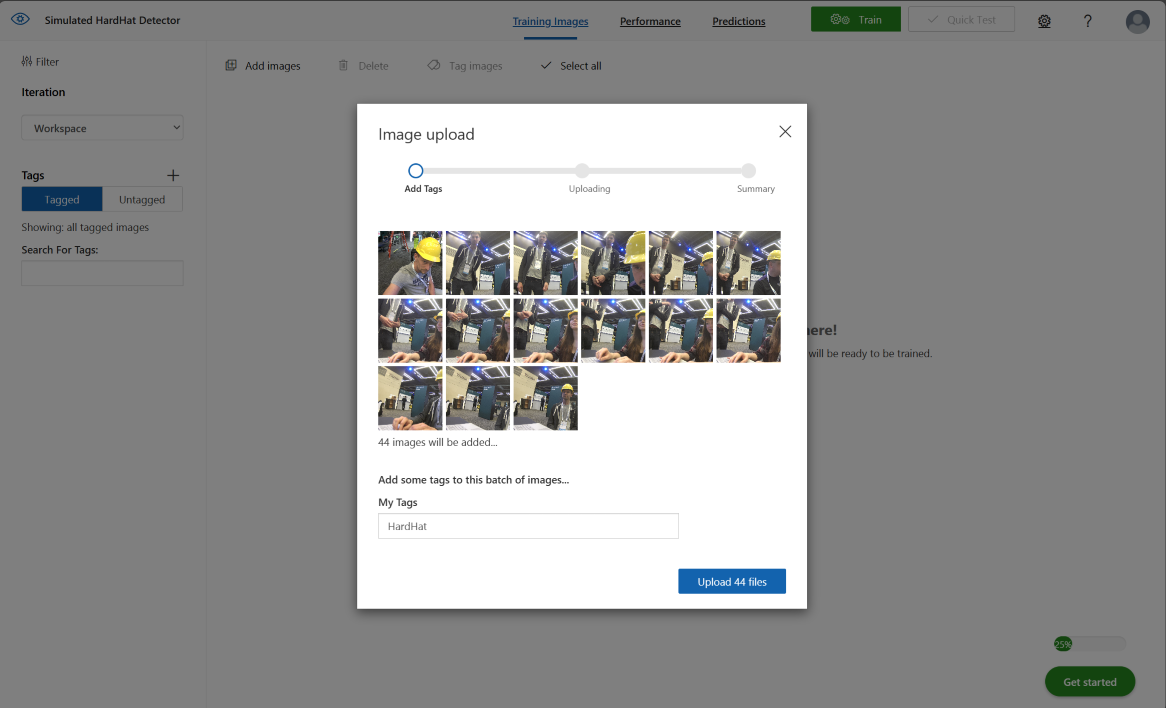
- Upload images to Custom Vision in batches. For the image classification model, use one batch per tag (images containing HardHat in the name, then NoHardHat), adding the appropriate tag during each upload.
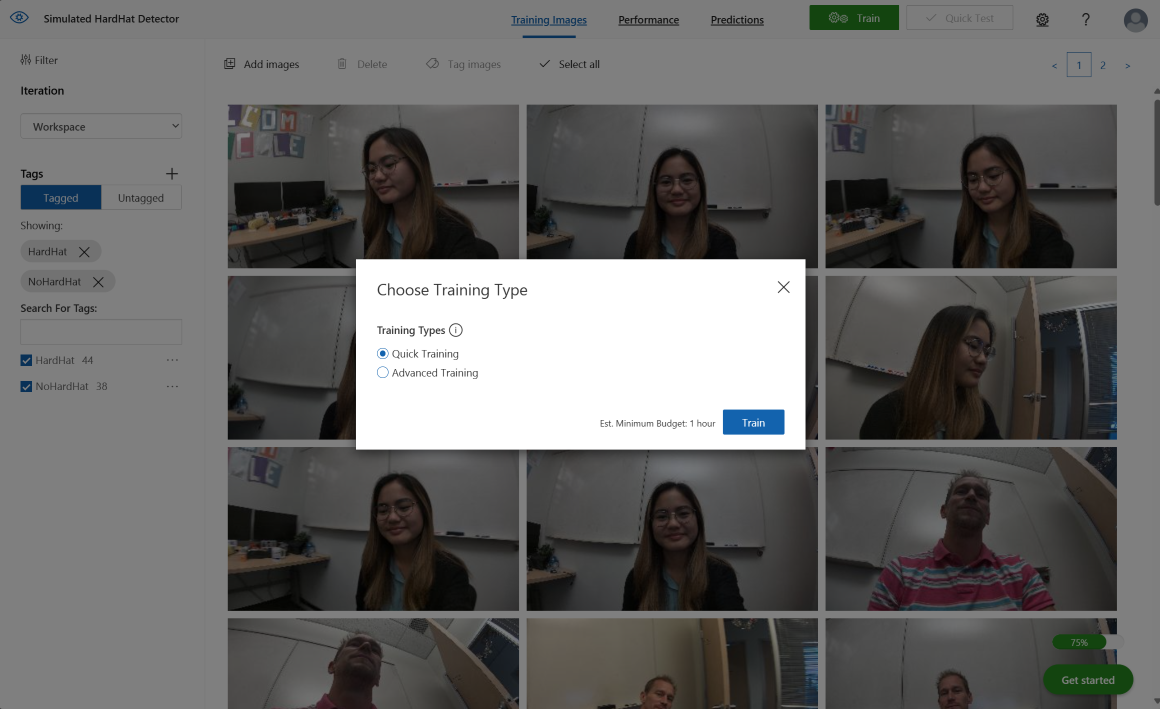
- After uploaded the two batches of images, select «Train» and in the dialog choose «Quick Training». Start the training by selecting «Train».
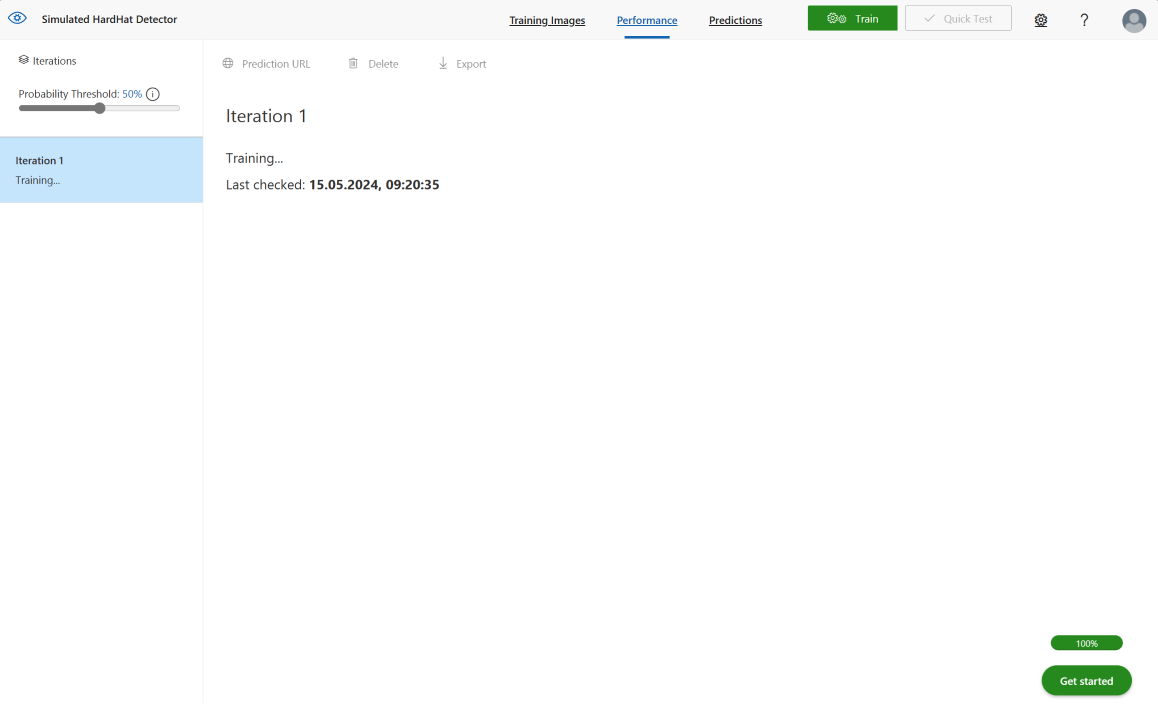
- Now starts the training iteration «Iteration 1».
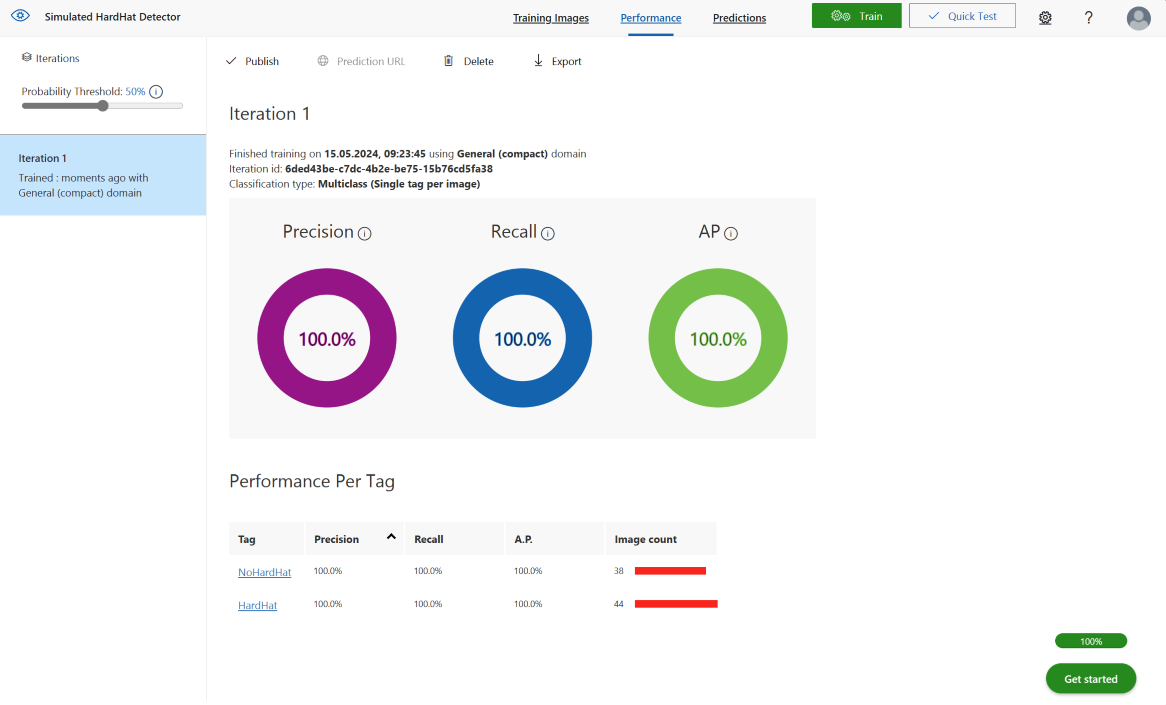
- After the training is successfully finished, review the model performance.
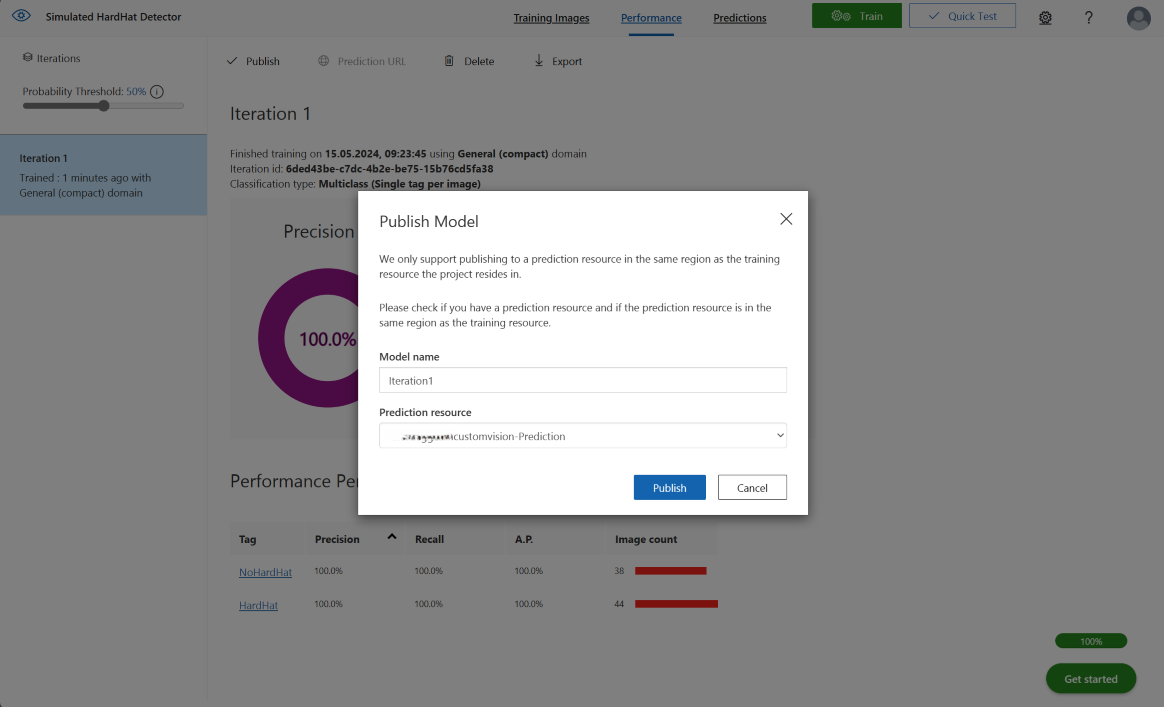
- Select «Publish» to publish the trained model. In the dialog choose your customvision-Prediction resource. Start publishing by selecting «Publish».
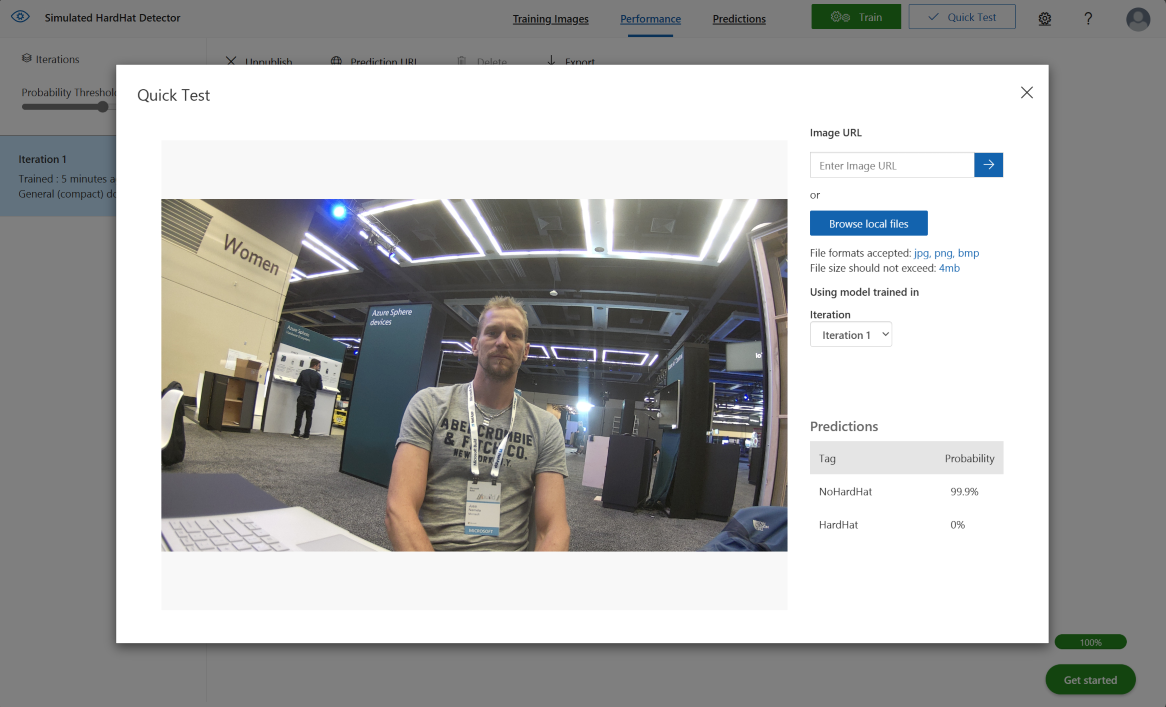
- Test your published model by selecting «Quick Test» and upload a Sample Image.
 Microsoft Azure Custom Vision
Login to the Azure Custom Vision Service at https://www.customvision.ai.
Microsoft Azure Custom Vision
Login to the Azure Custom Vision Service at https://www.customvision.ai.
| Topic | Setting |
|
Name: |
Simulated HardHat Detector |
|
Description: |
Detecting Factory Worker PPE equipped with HardHat using tagged photos to train the model. |
|
Project Types: |
Classification |
|
Domains: |
General (compact) |
|
Export Capabilities: |
Vision AI Dev Kit |
 Microsoft Azure Custom Vision
Create new project.
Microsoft Azure Custom Vision
Create new project.
 Microsoft Azure Custom Vision
Upload images to Custom Vision in batches. For the image classification model, use one batch per tag.
Microsoft Azure Custom Vision
Upload images to Custom Vision in batches. For the image classification model, use one batch per tag.
 Microsoft Azure Custom Vision
After uploaded the two batches of images, start quick training.
Microsoft Azure Custom Vision
After uploaded the two batches of images, start quick training.
 Microsoft Azure Custom Vision
Now starts the training iteration.
Microsoft Azure Custom Vision
Now starts the training iteration.
 Microsoft Azure Custom Vision
After the training is successfully finished, review the model performance.
Microsoft Azure Custom Vision
After the training is successfully finished, review the model performance.
 Microsoft Azure Custom Vision
Publish the trained model.
Microsoft Azure Custom Vision
Publish the trained model.
 Microsoft Azure Custom Vision
Test your published model by selecting «Quick Test» and upload a Sample Image.
Microsoft Azure Custom Vision
Test your published model by selecting «Quick Test» and upload a Sample Image.
Now we have a trained and published Custom Vision model to be used either in any Application like Power Apps, Power Automation or even at the Edge deployed on a Vision AI DevKit camera hardware.
Step 3 - Create new connection for your Power Apps environment
- Login to the Power Apps maker portal at https://make.powerapps.com.
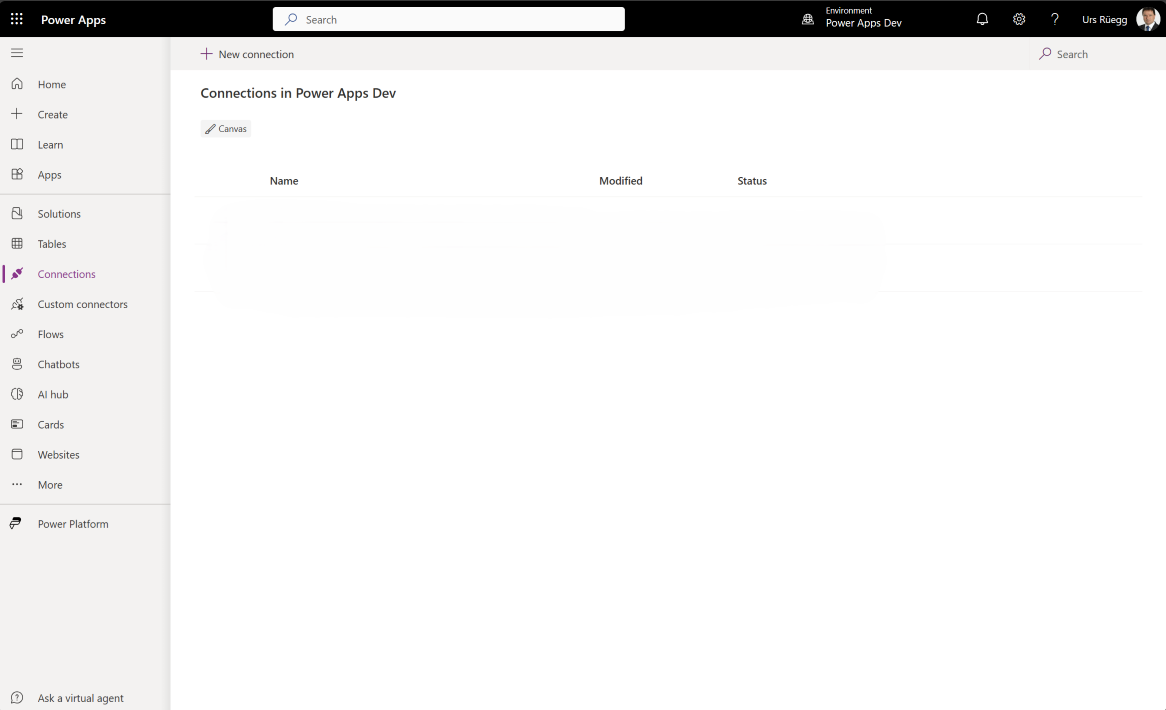
- Select «Connections» on the left menu.
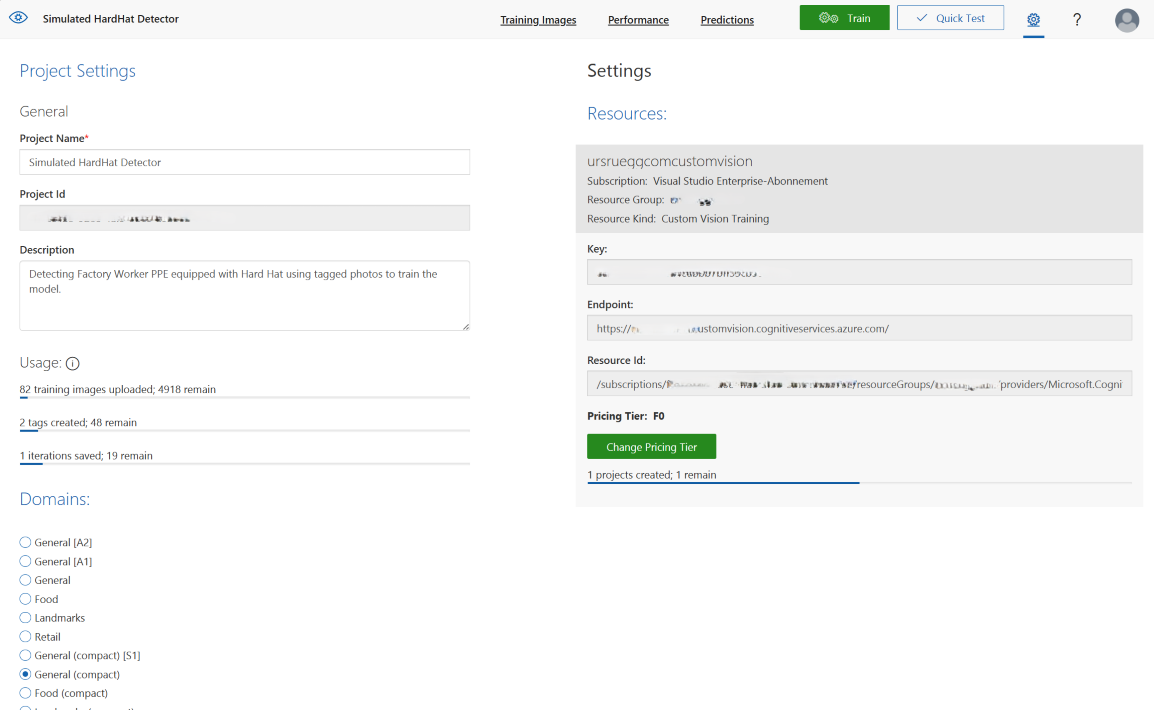
- To create the connection, you need to get the Endpoint and Key of your customvision-Prediction resource. Open the Azure Custom Vision Service at https://www.customvision.ai. Open your project and select the «Gear» (Settings) Icon to get the project settings. Copy the Key, Endpoint and Project Id.
- Select «+ New connection» to create a new connection and add the Prediction Key and Site URL (your endpoint).
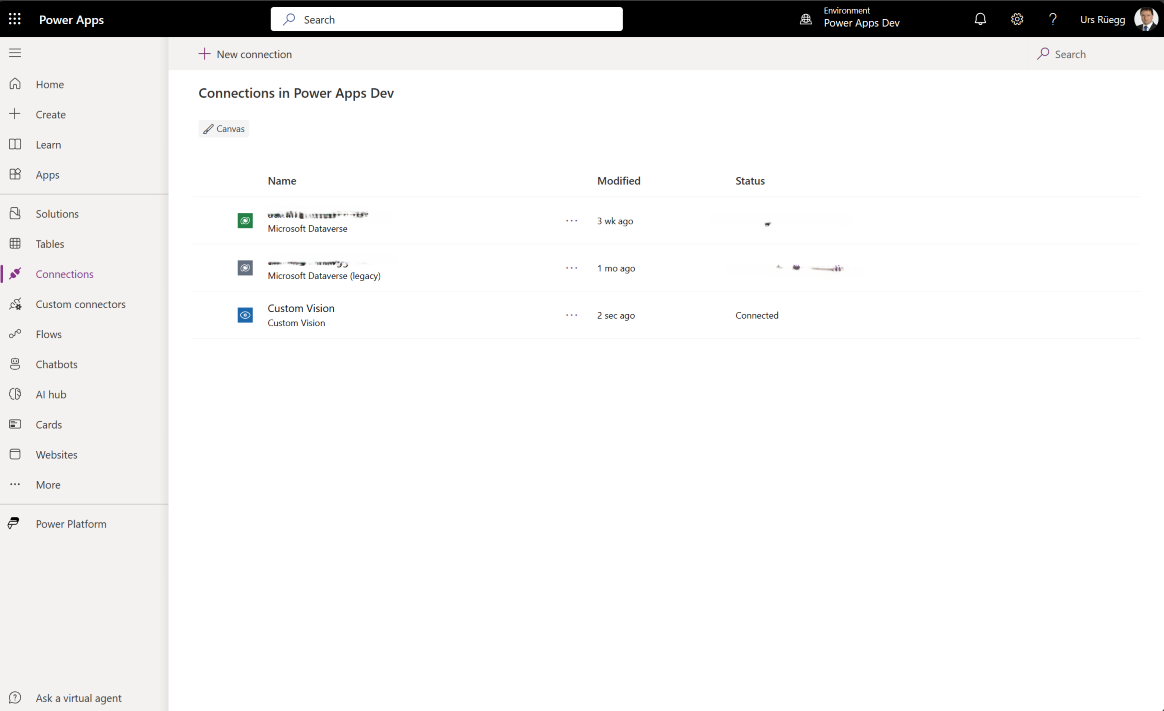
- Select «Create» button and a new connection reference is created within your environment.
 Microsoft Power Apps
Select «Connections» on the left menu and create a new connection.
Microsoft Power Apps
Select «Connections» on the left menu and create a new connection.
 Microsoft Custom Vision
Open your project and select the «Gear» (Settings) Icon to get the project settings. Copy the Key, Endpoint and Project Id.
Microsoft Custom Vision
Open your project and select the «Gear» (Settings) Icon to get the project settings. Copy the Key, Endpoint and Project Id.
 Microsoft Power Apps
Select «+ New connection» to create a new connection and add the Prediction Key and Site URL (your endpoint).
Microsoft Power Apps
Select «+ New connection» to create a new connection and add the Prediction Key and Site URL (your endpoint).
 Microsoft Power Apps
Select «Create» button and a new connection reference is created within your environment.
Microsoft Power Apps
Select «Create» button and a new connection reference is created within your environment.
Now we have prepared the Power Platform environment with a connection reference to your Custom Vision project. You can use this connection reference within your Power Platform eco-system to build Power Apps, Power Automate flows etc.
Step 4 - Create a Power Apps to test the custom vision model
- Login to the Power Apps maker portal at https://make.powerapps.com.
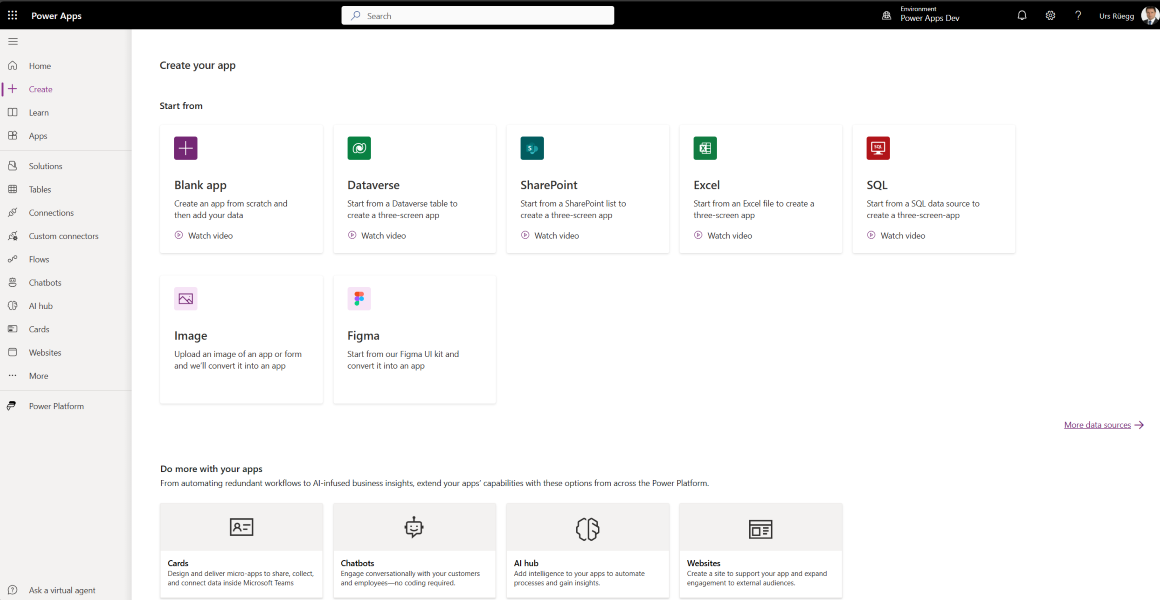
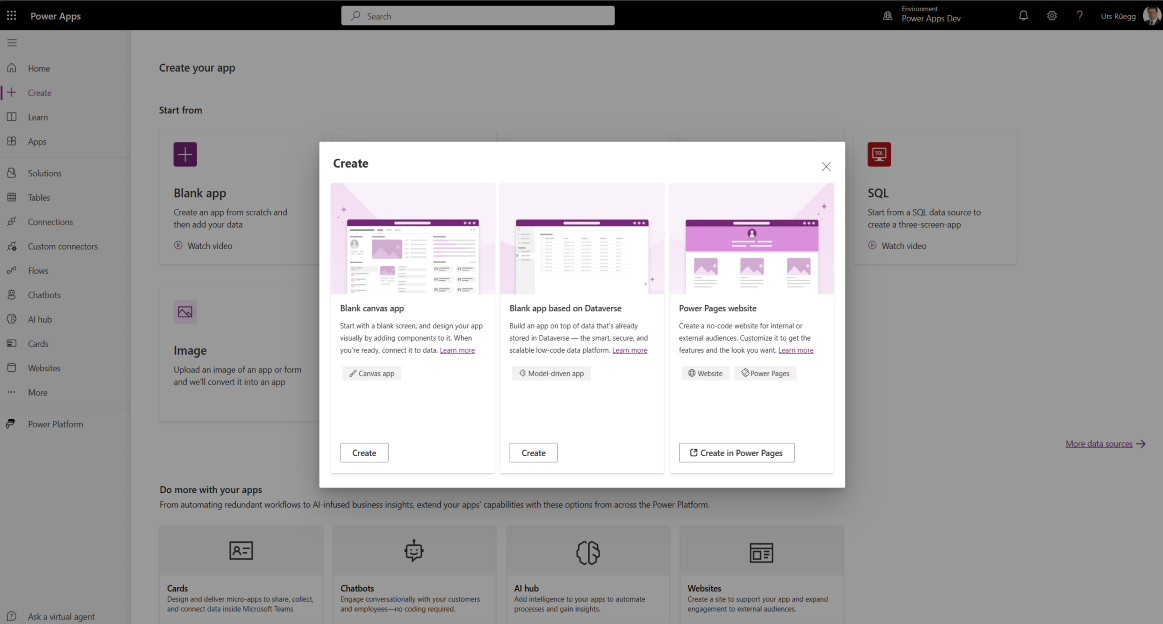
- Select «+ Create» and choose «Blank app».
- Select «Create» to create Blank canvas app.
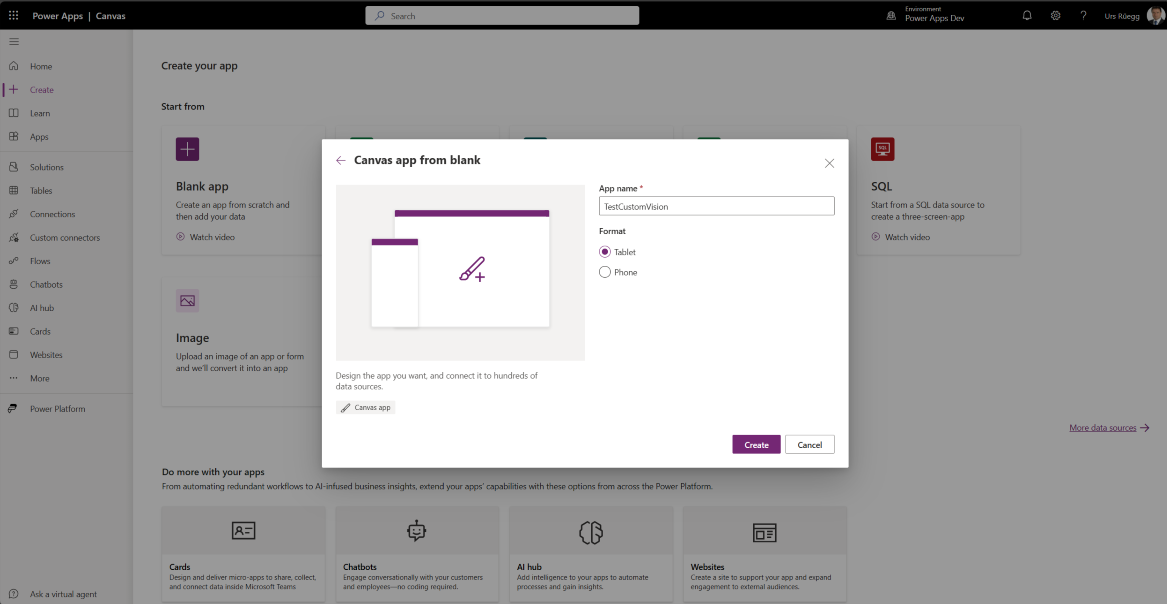
- Add App name and select format=Tablet. Select «Create» button.
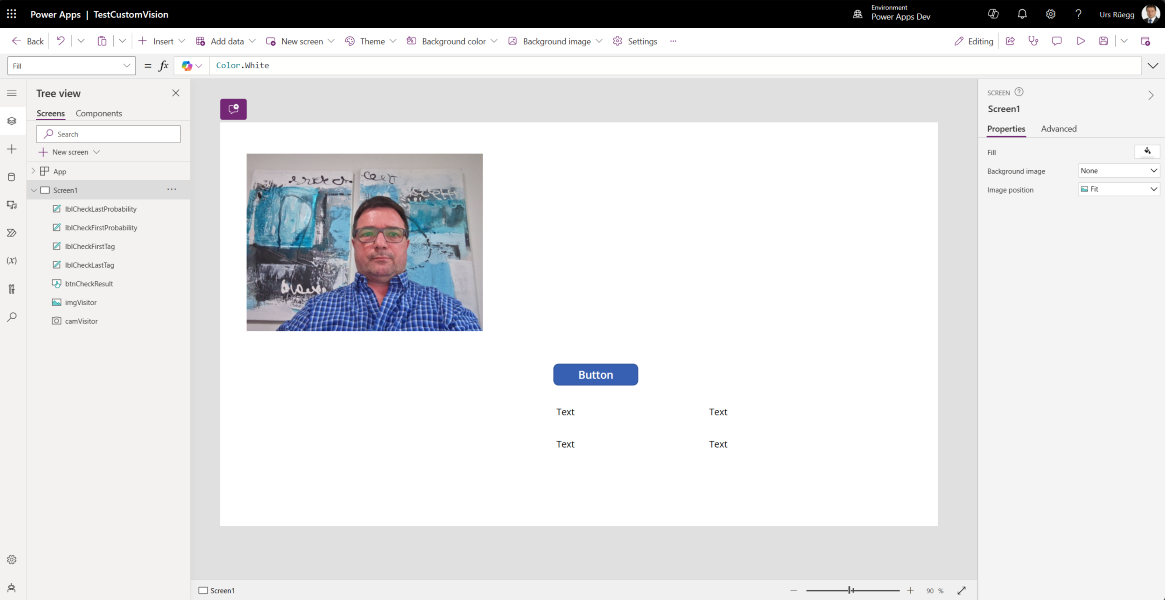
- Select «Screen1» and add the following controls to the screen and change the name appropriately.
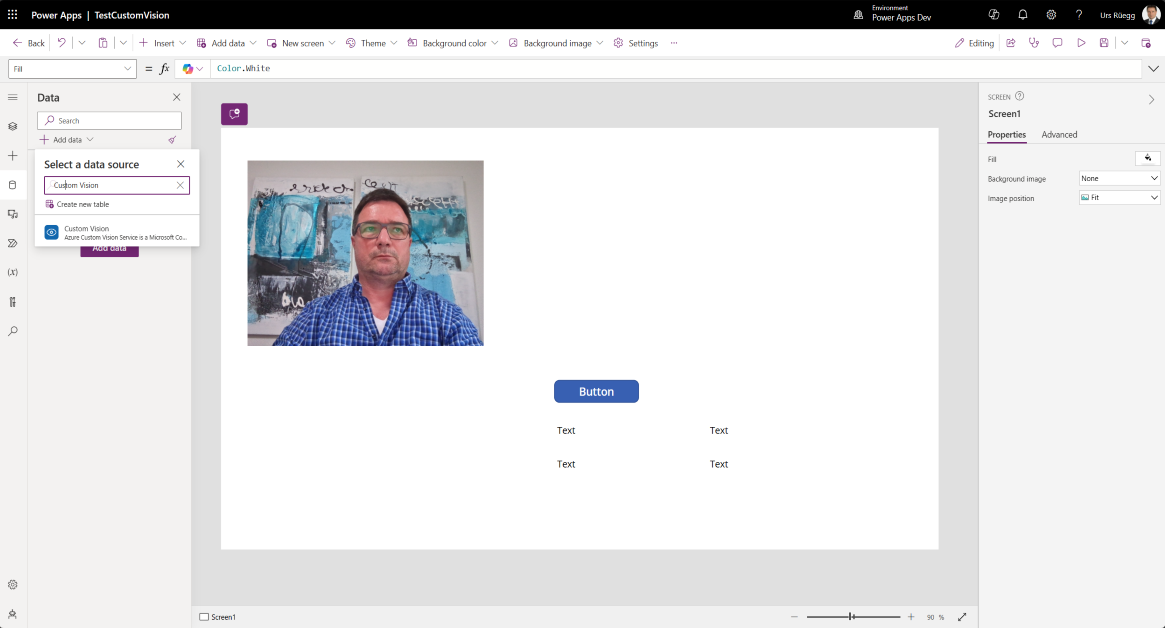
- Select «Data» and «+Add data» to add new data source. Enter «Custom Vision» to select a data source. Choose the «Custom Vision» connection and add it.
- Now change the properties for the following controls appropriately.
- Create two global variables for the Custom Vision Project ID and PublishName by select «Screen1» and change the OnVisible to
- Set(varCustomVisionClassifyImageProjectID, “Your Custom Vision Project ID reference”);
- Set(varCustomVisionClassifyImagePublishName, “Your Custom Vision Publish Name reference”)
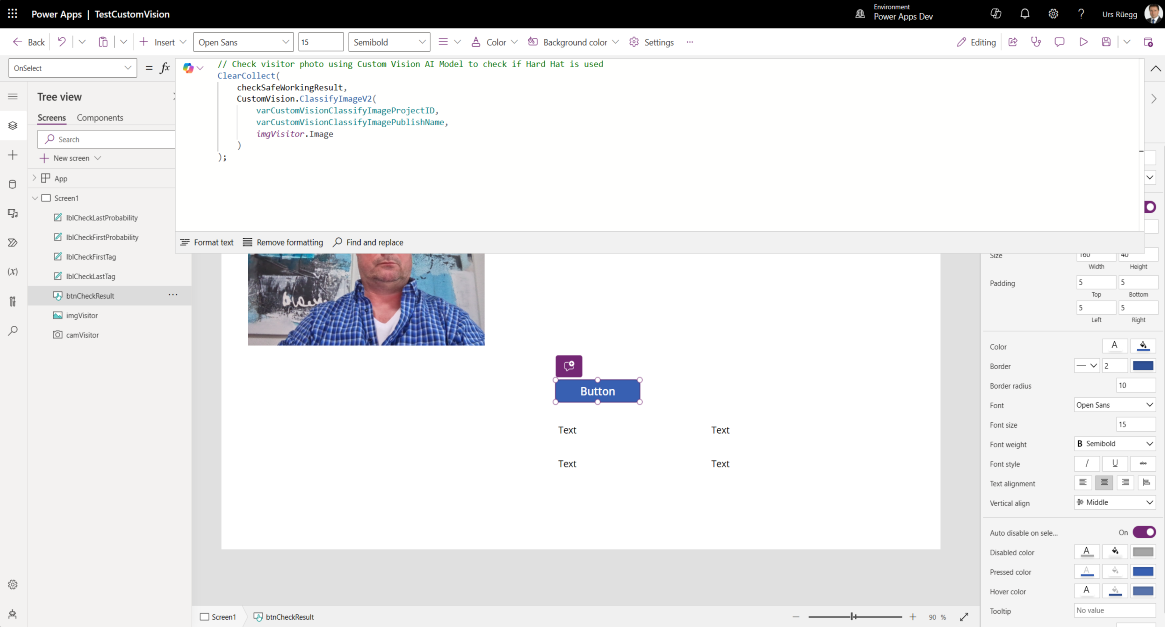
- Select the btnCheckResult control and change OnSelect=
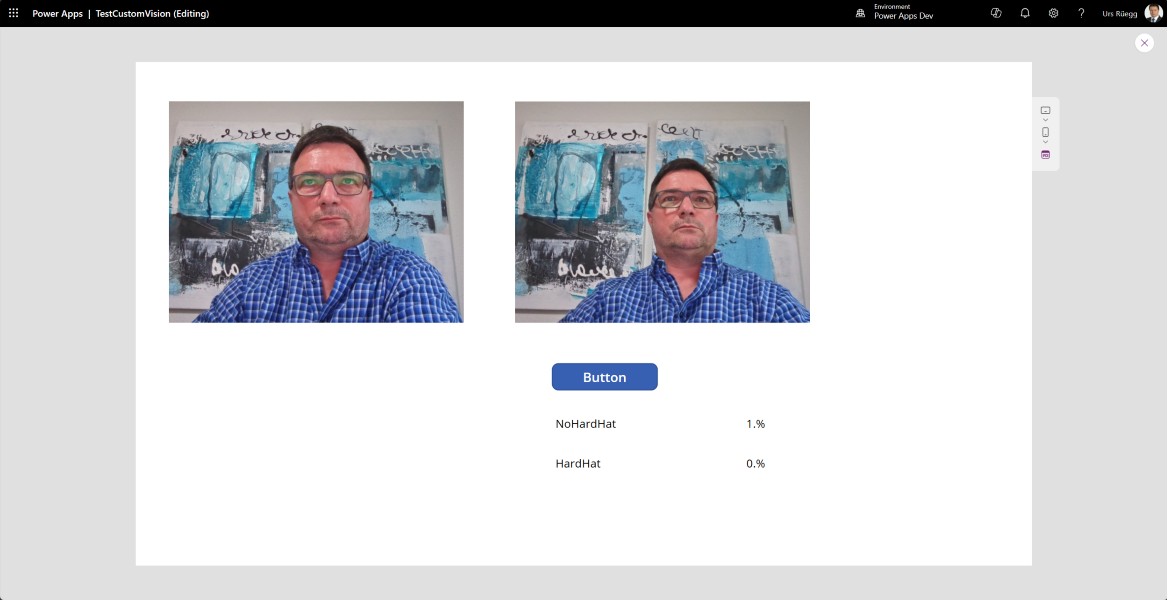
- Run your app and test capturing an image from the camera stream by click first on the camera to capture the photo and then select the Button to check the photo with the Custom Vision model.
 Microsoft Power Apps
Select «+ Create» and choose «Blank app».
Microsoft Power Apps
Select «+ Create» and choose «Blank app».
 Microsoft Power Apps
Select «Create» to create Blank canvas app.
Microsoft Power Apps
Select «Create» to create Blank canvas app.
 Microsoft Power Apps
Add App name and select format=Tablet. Select «Create» button.
Microsoft Power Apps
Add App name and select format=Tablet. Select «Create» button.
| Control | Naming |
|
Camera |
camVisitor |
|
Image |
imgVisitor |
|
Button |
btnCheckResult |
|
Label |
lblCheckFirstTag |
|
Label |
lblCheckLastTag |
|
Label |
lblCheckFirstProbability |
|
Label |
lblCheckLastProbability |
|
Label |
lblCheckLastTag |
 Microsoft Power Apps
>Select Screen1 and add the following controls to the screen and change the name appropriately.
Microsoft Power Apps
>Select Screen1 and add the following controls to the screen and change the name appropriately.
 Microsoft Power Apps
Select «Data» and «+Add data» to add new data source.
Microsoft Power Apps
Select «Data» and «+Add data» to add new data source.
| Control | Method | Value |
|
imgVisitor |
Image |
camVisitor.Photo |
|
lblCheckFirstTag |
Text |
First(First(checkSafeWorkingResult).predictions).tagName |
|
lblCheckLastTag |
Text |
Last(First(checkSafeWorkingResult).predictions).tagName |
|
lblCheckFirstProbability |
Text |
Text(First(First(checkSafeWorkingResult).predictions).probability, "[$-en-US]0.##")&"%" |
|
lblCheckLastProbability |
Text |
Text(Last(First(checkSafeWorkingResult).predictions).probability, "[$-en-US]0.##")&"%" |
// Check visitor photo using Custom Vision AI Model to check if Hard Hat is used
ClearCollect(
checkSafeWorkingResult,
CustomVision.ClassifyImageV2(
varCustomVisionClassifyImageProjectID,
varCustomVisionClassifyImagePublishName,
imgVisitor.Image
)
);
 Microsoft Power Apps
Select the btnCheckResult control and change OnSelect.
Microsoft Power Apps
Select the btnCheckResult control and change OnSelect.
 Microsoft Power Apps
Run your app and test capturing an image from the camera stream by click first on the camera to capture the photo and then select the Button to check the photo with the Custom Vision model.
Microsoft Power Apps
Run your app and test capturing an image from the camera stream by click first on the camera to capture the photo and then select the Button to check the photo with the Custom Vision model.
In the test app we used hard coded references for the Project ID and Published Name, Best Practice is to create a solution first and add environment variables to hold the context related variables independent of the environment like Development, Testing and Production. See details how to Use environment variables in Power Platform solutions - Power Apps | Microsoft Learn.
Your code for the Screen1 and change OnVisible as following
| Control | Method | Value |
|
Screen1 |
OnVisible |
// Get Custom Vision Project ID and Published Model Name reference from environment variables |
Conclusion
In this blog, we have demonstrated how to use Azure AI Services for Vision and Object recognition in a Power Apps canvas app. We have used the Custom Vision service to create and train a custom image classification model that can recognize different types of flowers. We have also used the Computer Vision service to extract text and other information from images. We have integrated these services with our app using the Cognitive Services Connector. By using Azure AI Services for Vision and Object recognition, we can enhance our app's functionality and user experience with powerful and scalable image analysis capabilities.
What are Azure AI services?
Azure AI services help developers and organizations rapidly create intelligent, cutting-edge, market-ready, and responsible applications with out-of-the-box and prebuilt and customizable APIs and models. Example applications include natural language processing for conversations, search, monitoring, translation, speech, vision, and decision-making.
| Service | Description |
|
Azure OpenAI |
Perform a wide variety of natural language tasks. |
|
Custom Vision |
Customize image recognition for your business. |
|
Face |
Detect and identify people and emotions in images. |
|
Speech |
Speech to text, text to speech, translation, and speaker recognition. |
|
Translator |
Use AI-powered translation technology to translate more than 100 in-use, at-risk, and endangered languages and dialects. |
|
Vision |
Analyze content in images and videos. |
20. May 2024