Jasmin's CUBOTino Project
Step 3 - Raspberry Pi Zero 2 Installation
We use the simplified installation using the GitHub repository. This method is not only easier and faster, but also makes it easier to update the robot when newer updates are available on GitHub.
Part 1 - Flash the OS 11 (Bullseye) to the microsSD card
For CUBOTino the recommend operating system is OS 11 (Bullseye).
- Download Raspberry Pi Imager https://www.raspberrypi.com/software/
- Flash the OS to the microSD card:
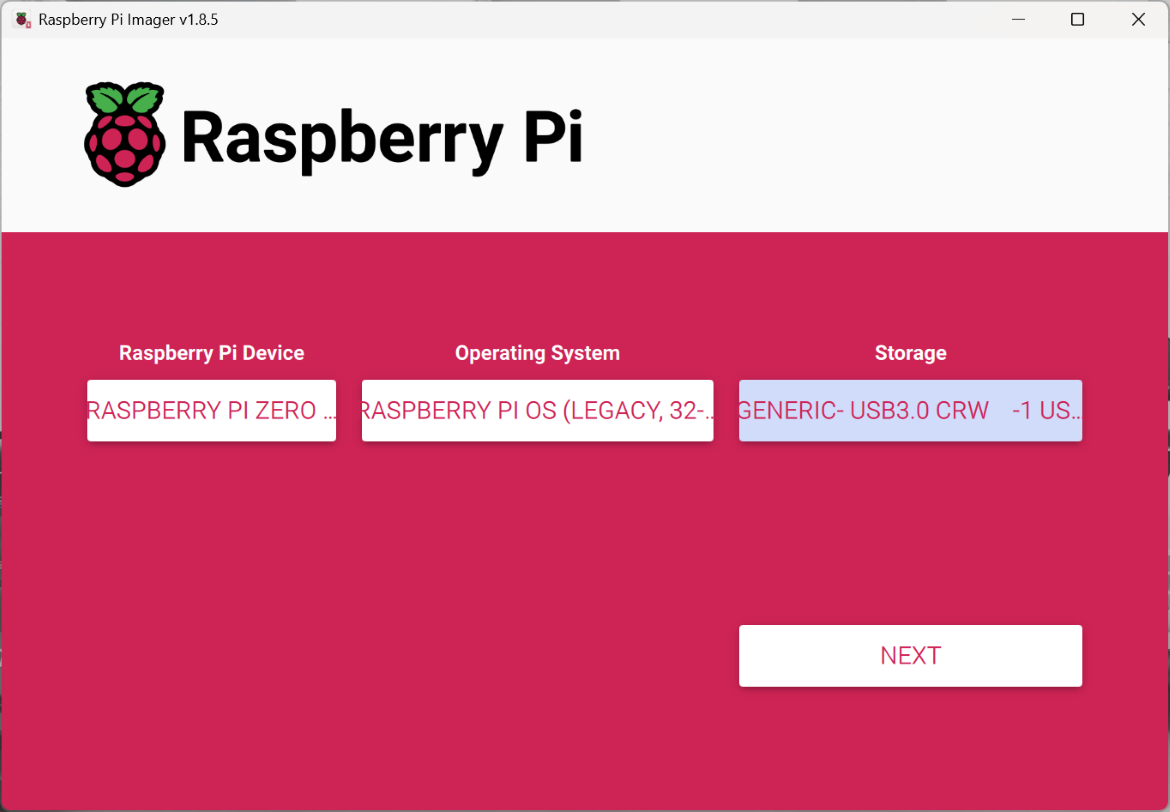
- Start the Rasperry Pi Imager
 Raspberry Pi Imager/span>
Start the Rasperry Pi Imager.
Raspberry Pi Imager/span>
Start the Rasperry Pi Imager.
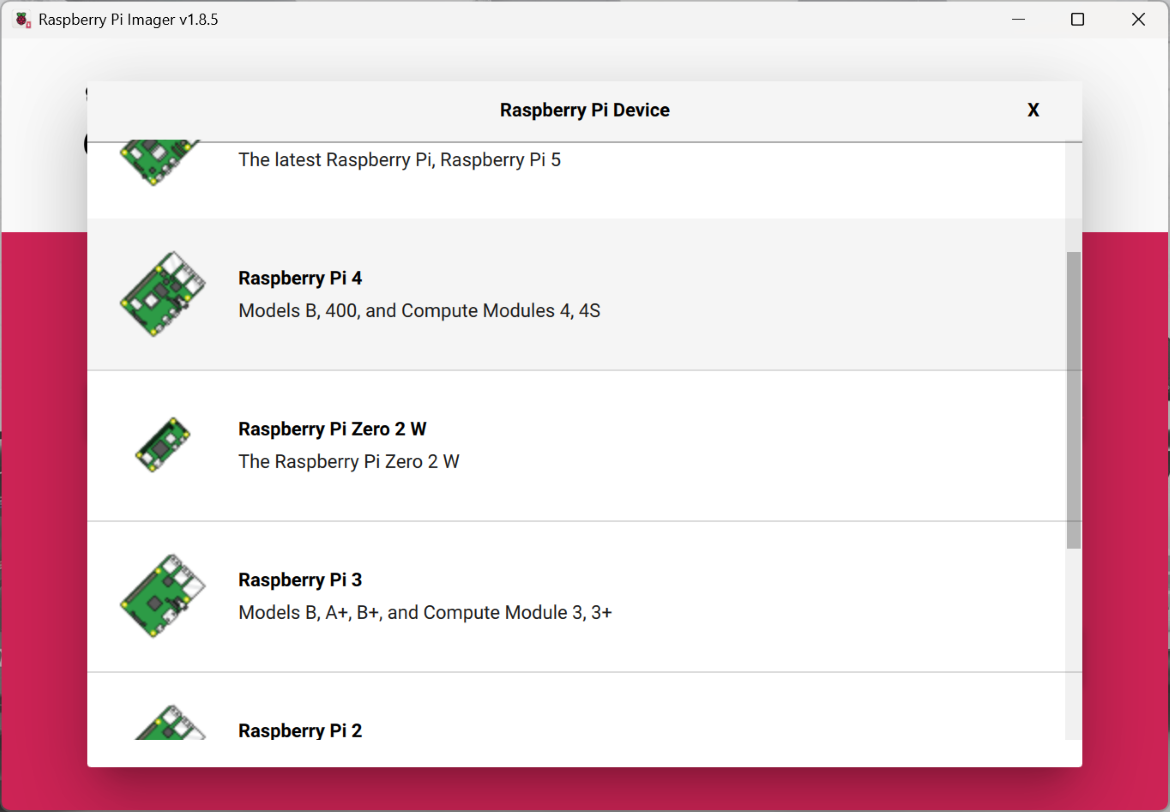
- Choose the Rasbperry Pi Device - Raspberry Pi Zero 2 W
 Raspberry Pi Imager/span>
Choose the Rasbperry Pi Device - Raspberry Pi Zero 2 W.
Raspberry Pi Imager/span>
Choose the Rasbperry Pi Device - Raspberry Pi Zero 2 W.
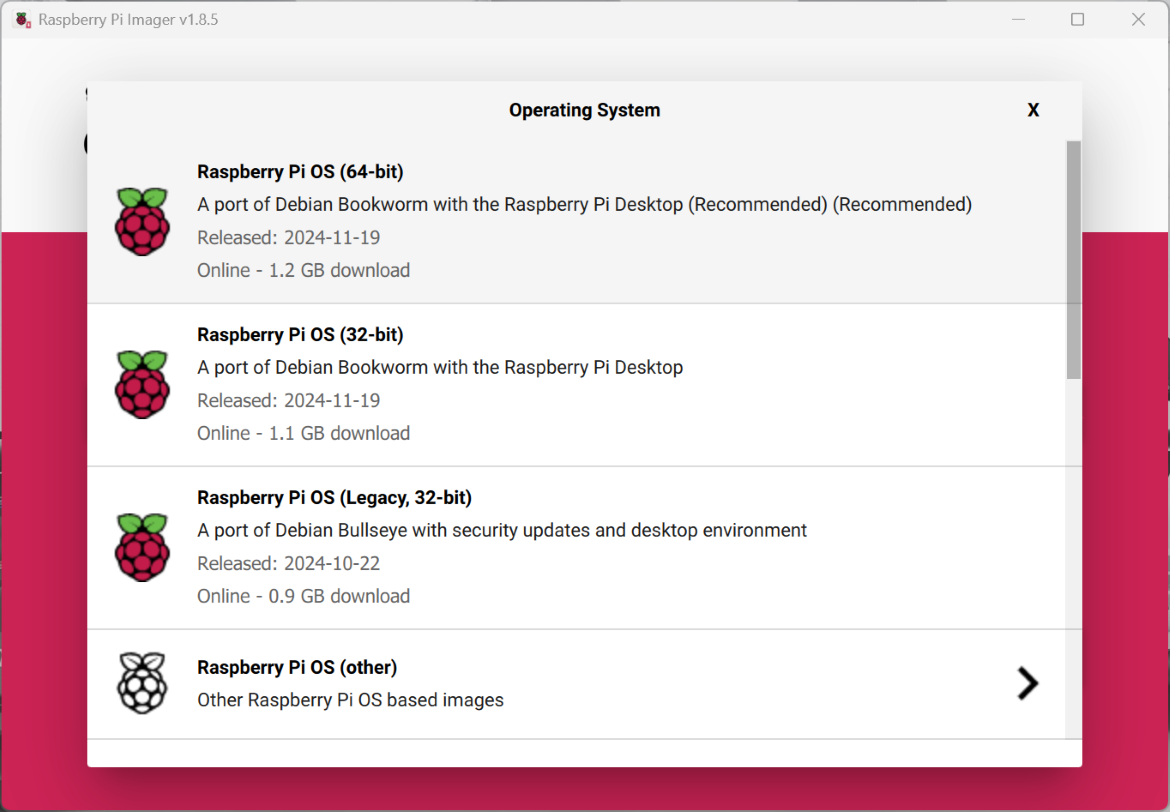
- Choose the Rasbperry Pi Operating System - Raspberry Pi OS (Legacy, 32-bit)
 Raspberry Pi Imager/span>
Choose the Rasbperry Pi Operating System - Raspberry Pi OS (Legacy, 32-bit).
Raspberry Pi Imager/span>
Choose the Rasbperry Pi Operating System - Raspberry Pi OS (Legacy, 32-bit).
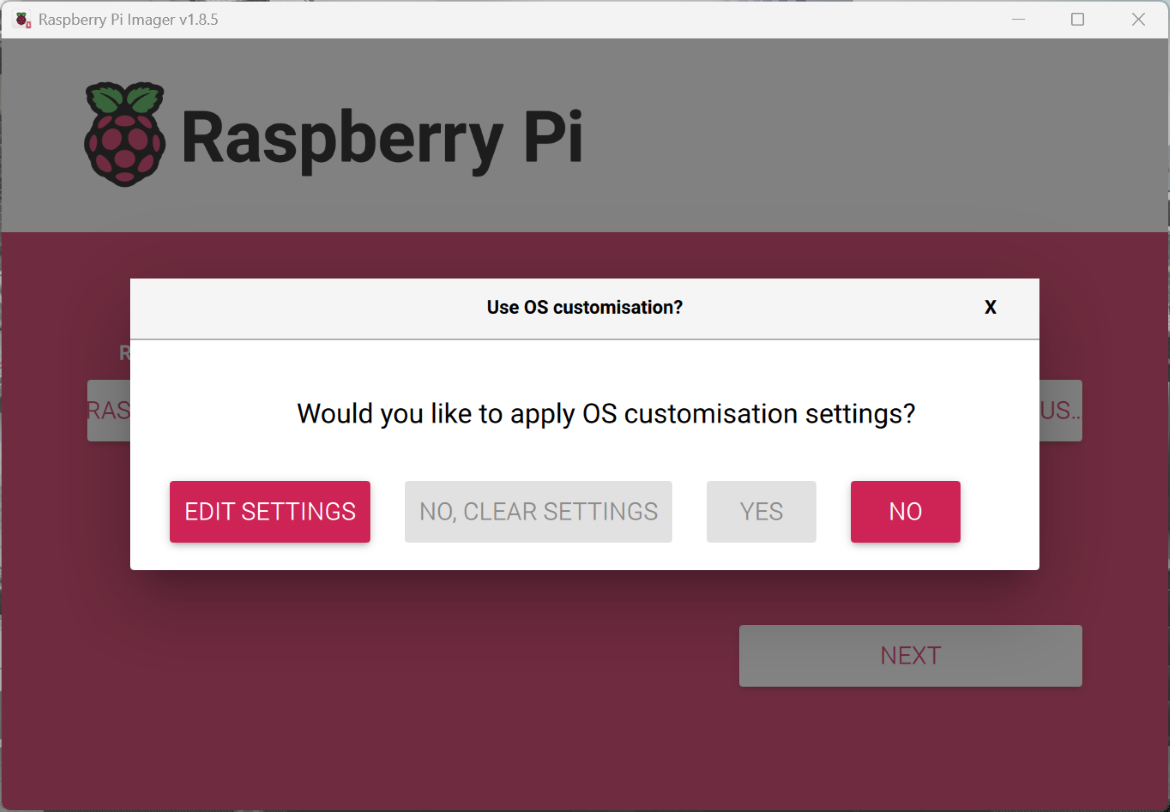
- Choose the Rasbperry Pi Settings - Edit Settings
 Raspberry Pi Imager/span>
Choose the Rasbperry Pi Settings - Edit Settings.
Raspberry Pi Imager/span>
Choose the Rasbperry Pi Settings - Edit Settings.
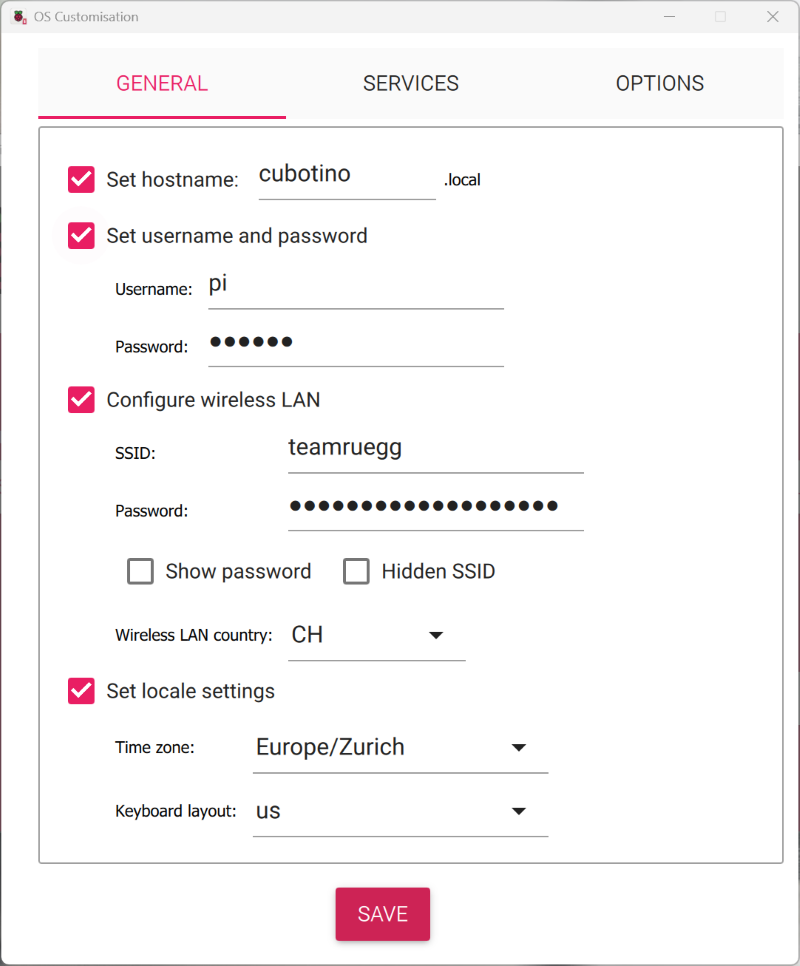
- Change the Rasbperry Pi General Settings - hostname, username, WLAN, local settings as following
 Raspberry Pi Imager/span>
Change the Rasbperry Pi General Settings - hostname, username, WLAN, local settings as following.
Raspberry Pi Imager/span>
Change the Rasbperry Pi General Settings - hostname, username, WLAN, local settings as following.
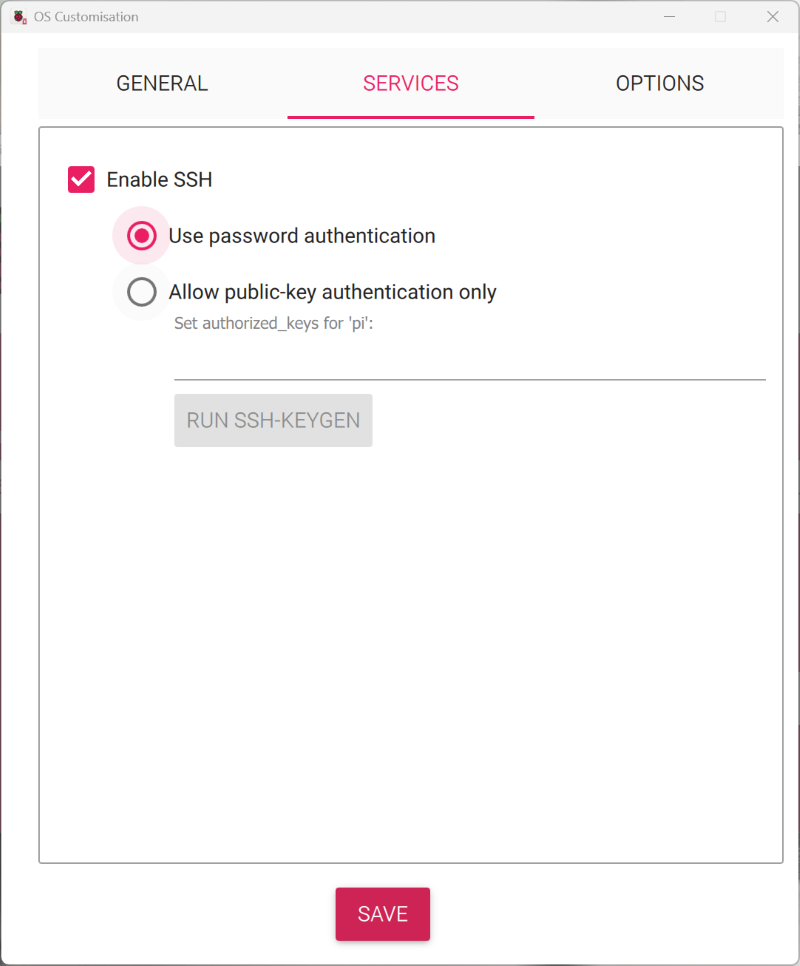
- Change the Rasbperry Pi Services Settings - Enable SSH as following
 Raspberry Pi Imager/span>
Change the Rasbperry Pi Services Settings - Enable SSH as following.
Raspberry Pi Imager/span>
Change the Rasbperry Pi Services Settings - Enable SSH as following.
- Change the Rasbperry Pi Options Settings - as following
 Raspberry Pi Imager/span>
Change the Rasbperry Pi Options Settings - as following.
Raspberry Pi Imager/span>
Change the Rasbperry Pi Options Settings - as following.
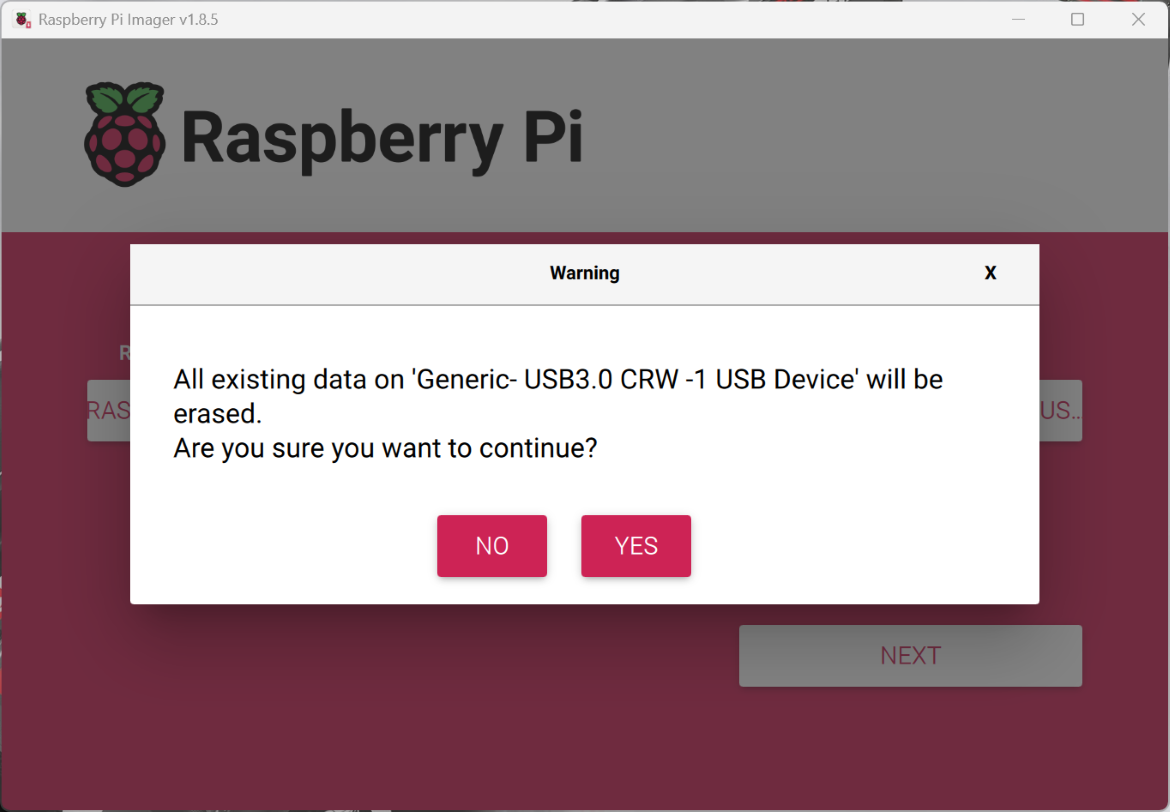
- Confirm the Rasbperry Pi Options Settings and select «Yes»
 Raspberry Pi Imager/span>
Confirm the Rasbperry Pi Options Settings and select «Yes»
Raspberry Pi Imager/span>
Confirm the Rasbperry Pi Options Settings and select «Yes»
- Choose the Rasbperry Pi Storage - USB Device with the SD Card inserted and select «Yes»
 Raspberry Pi Imager/span>
Choose the Rasbperry Pi Storage - USB Device with the SD Card inserted and select «Yes».
Raspberry Pi Imager/span>
Choose the Rasbperry Pi Storage - USB Device with the SD Card inserted and select «Yes».
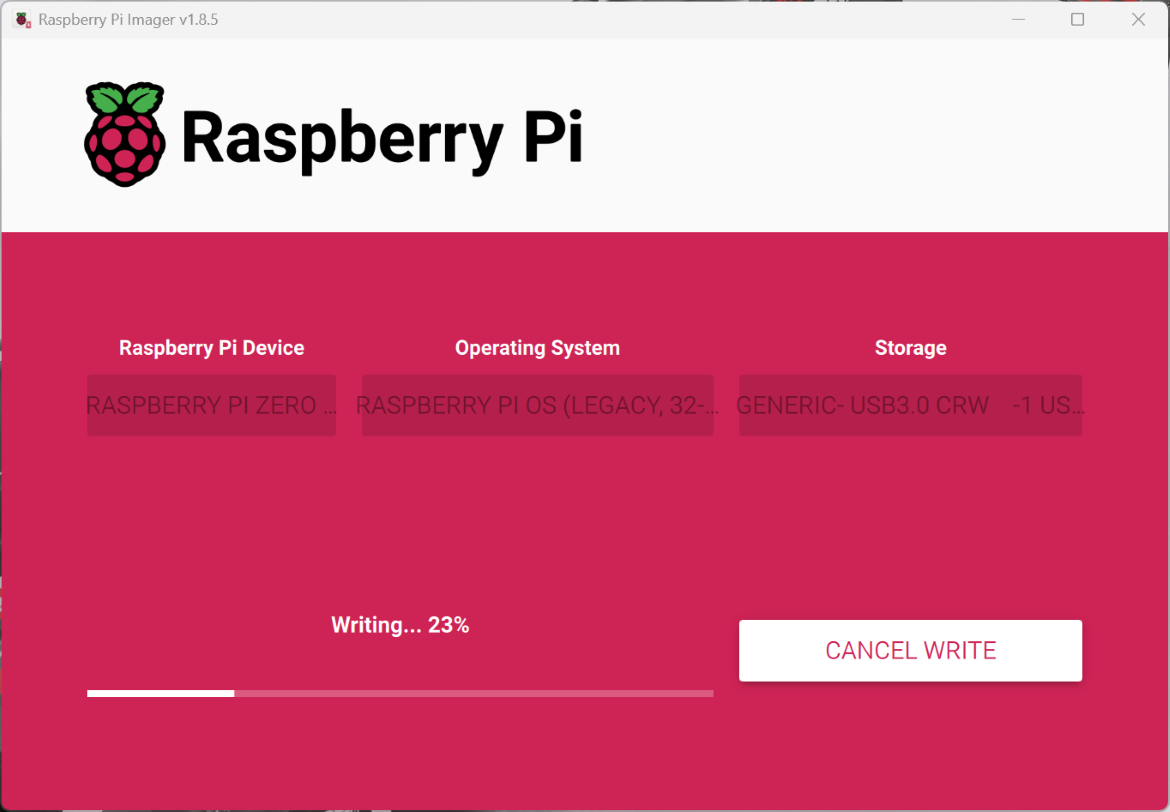
- Rasbperry Pi Imager - Writing the image to the SD Card
 Raspberry Pi Imager/span>
Rasbperry Pi Imager - Writing the image to the SD Card.
Raspberry Pi Imager/span>
Rasbperry Pi Imager - Writing the image to the SD Card.
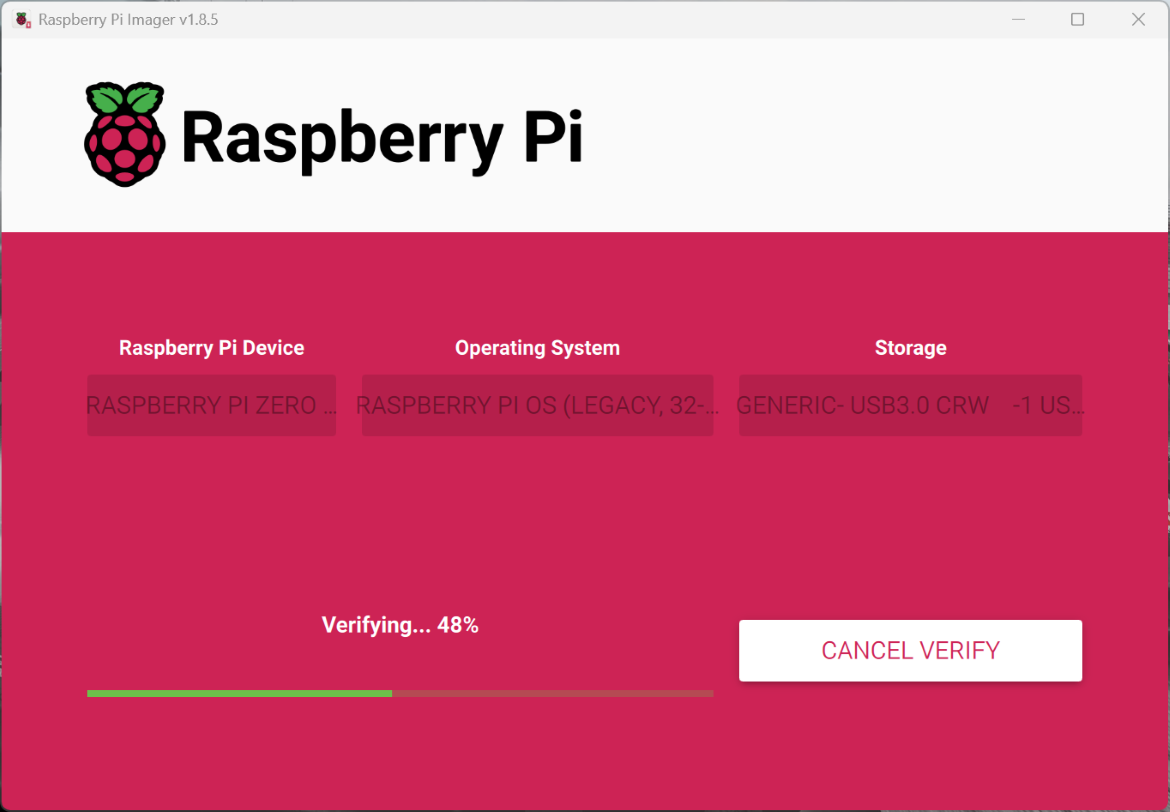
- Rasbperry Pi Imager - Verifying the image on the SD Card
 Raspberry Pi Imager/span>
Rasbperry Pi Imager - Verifying the image on the SD Card.
Raspberry Pi Imager/span>
Rasbperry Pi Imager - Verifying the image on the SD Card.
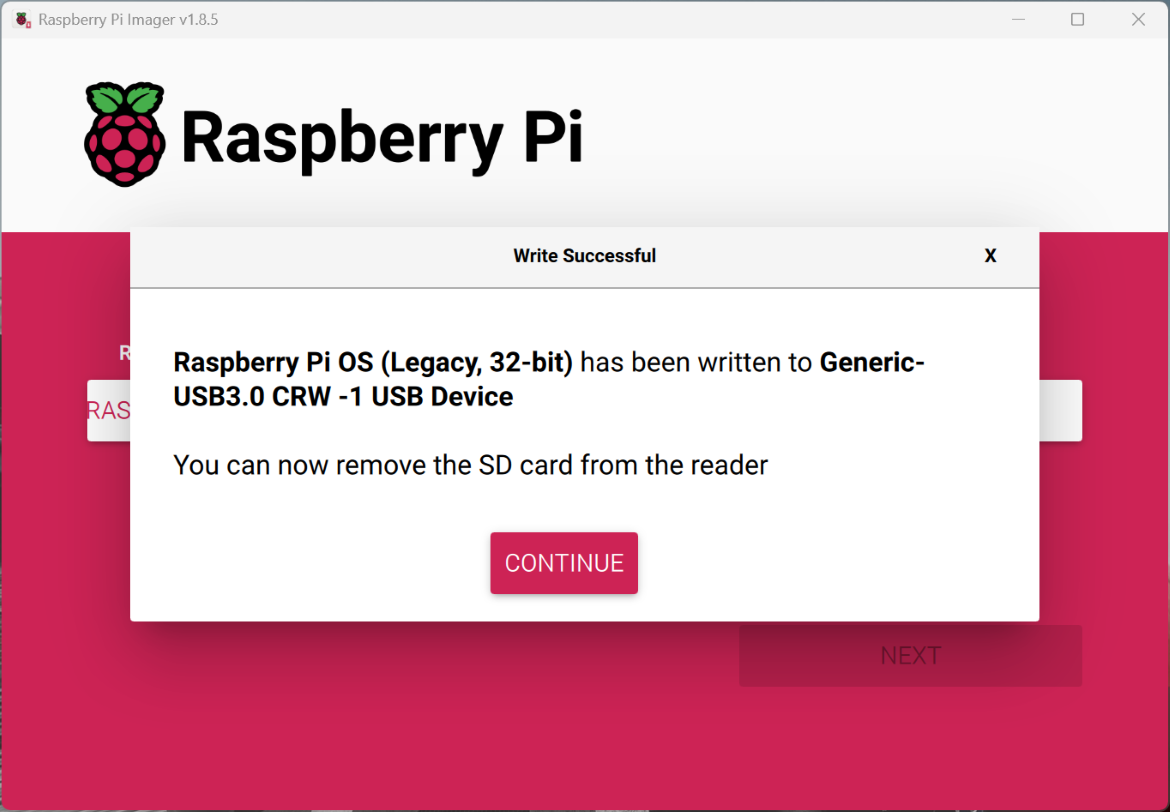
- Rasbperry Pi Imager - Raspberry Pi OS image is successfull on the SD Card
 Raspberry Pi Imager/span>
Rasbperry Pi Imager - Raspberry Pi OS image is successfull on the SD Card.
Raspberry Pi Imager/span>
Rasbperry Pi Imager - Raspberry Pi OS image is successfull on the SD Card.
Now we finished the first part. Next step is to install and configure the cubertino software.
Part 2 - Install and configure cubertino on the Raspberry Pi
...
- ...
Special thanks to Andrea Favero, inventor of the CUPERTino Makers project. Chad Vanblokland, inventor of the CUBERTino Connection Board and for sharing the Gerber files to order it.
6. Dec 2024